
Download a backup to your Windows computer and extract the files you need without restoring the VPS. If you want to recover files directly on your VPS instead, attach the backup to your server.
TABLE OF CONTENTS
- Before you begin
- Download your backup
- Extract the files
- Alternative: mount a Windows-readable partition with OSFMount
- Get help
Before you begin
The 7-Zip example uses an Ubuntu backup with an ext4 filesystem. The alternative OSFMount method is for a partition that Windows can read. Neither method covers every filesystem or encrypted volume.
You need a completed backup, a current release of 7-Zip, and enough local free space for the download, the decompressed disk image and any partition images or files you extract.
This procedure is for extracting files, not for restoring a working server or preserving every filesystem permission and application state.
For example, a 20 GB virtual disk can expand to a 20 GB raw image even when its compressed download is much smaller. Extracting a partition image can require another nearly 20 GB, plus space for the recovered files. Check free space before starting.
Download your backup
- Open the server in mPanel, then select Backups > Manage.
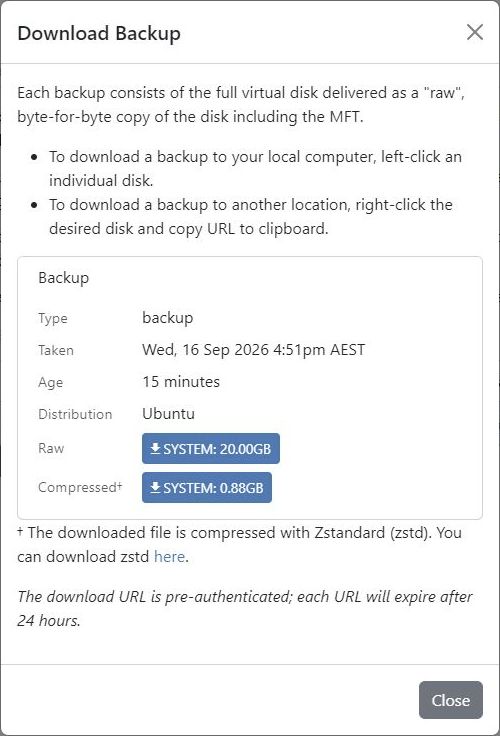
- Select the required backup and choose Download....
- Choose the disk under Compressed for a Zstandard download, or Raw for an uncompressed disk image.
Keep the download link private
The link grants access to the backup without another login and expires after 24 hours. Store downloaded backups securely.
Extract the files
- For a compressed download, use 7-Zip to extract the disk image into a dedicated working folder. Skip decompression if you downloaded the raw image.
- Open the disk image in 7-Zip. A partitioned disk may show several partition images.
- Open the partition containing the files you need. Do not assume it is always
0.img; identify it by its filesystem and contents. - Extract the required files to a separate destination folder and check them before using them to replace anything.
If 7-Zip reports an error or cannot read the filesystem, do not assume the extracted files are complete. Preserve the original download. Encrypted, damaged or unsupported filesystems may require their own recovery tools.
Alternative: mount a Windows-readable partition with OSFMount
OSFMount can expose a local disk image as a drive letter. Use it for a filesystem Windows can read; mounting an image does not add support for Linux filesystems.
You need administrator privileges and a Windows version supported by the current OSFMount release. Decompress the backup first, as described above, or use the raw download.
Keep the backup read-only
Keep read-only mounting enabled. If Windows asks to initialise or format the disk, cancel that prompt. Do not modify the backup to make it appear in Explorer.
- Install OSFMount from its official website and open it.
- Select Mount new... and choose the decompressed disk image.
- Select the partition containing your files and an available drive letter. Keep the read-only option enabled, then mount it.
- Open the assigned drive in File Explorer and copy the required files to a separate folder. Check the recovered files before replacing anything.
- Close files opened from the image and dismount it in OSFMount when finished.
If the driver will not load or the volume cannot be opened, stop and consult the vendor's troubleshooting guidance. Do not disable Windows security protections to force it to load.
Get help
Contact BinaryLane support if you cannot access or download your platform backup. Filesystem recovery, third-party extraction tools and restoring application data remain part of managing your server.