
Customers have the ability to rename their services on BinaryLane. Currently, we support changing the name of the following services:
- Cloud Servers (VPSs)
- Virtual Private Clouds (VPC)
- Load Balancer Hostnames
- API Key Names
- SSH Key Names
TABLE OF CONTENTS
- Rename a Cloud Server (VPS)
- Rename a Virtual Private Cloud (VPC)
- Rename a Load Balancer's Hostname
- Rename an API Key Name
Rename a Cloud Server (VPS)
Your Cloud Server (VPS) has two distinct names: the name displayed within mPanel, and the hostname configured within the operating system.
The instructions provide guidance on changing the displayed service's 'hostname' within mPanel, however, keep in mind the operating system's hostname within the Operating System (OS) must be configured separately. If your server(s) are configured to use DHCP, hostname changes made within mPanel should be automatically reflected within the OS.
For more information about configuring the system hostname within the OS, please refer to `How to Change Hostname/Server Name in Windows Server 2022` for Windows or `How to Change Hostname/Server Name in Ubuntu 24.04` for Linux (Ubuntu)
Your Cloud Server's hostname is reflected within the mPanel here:

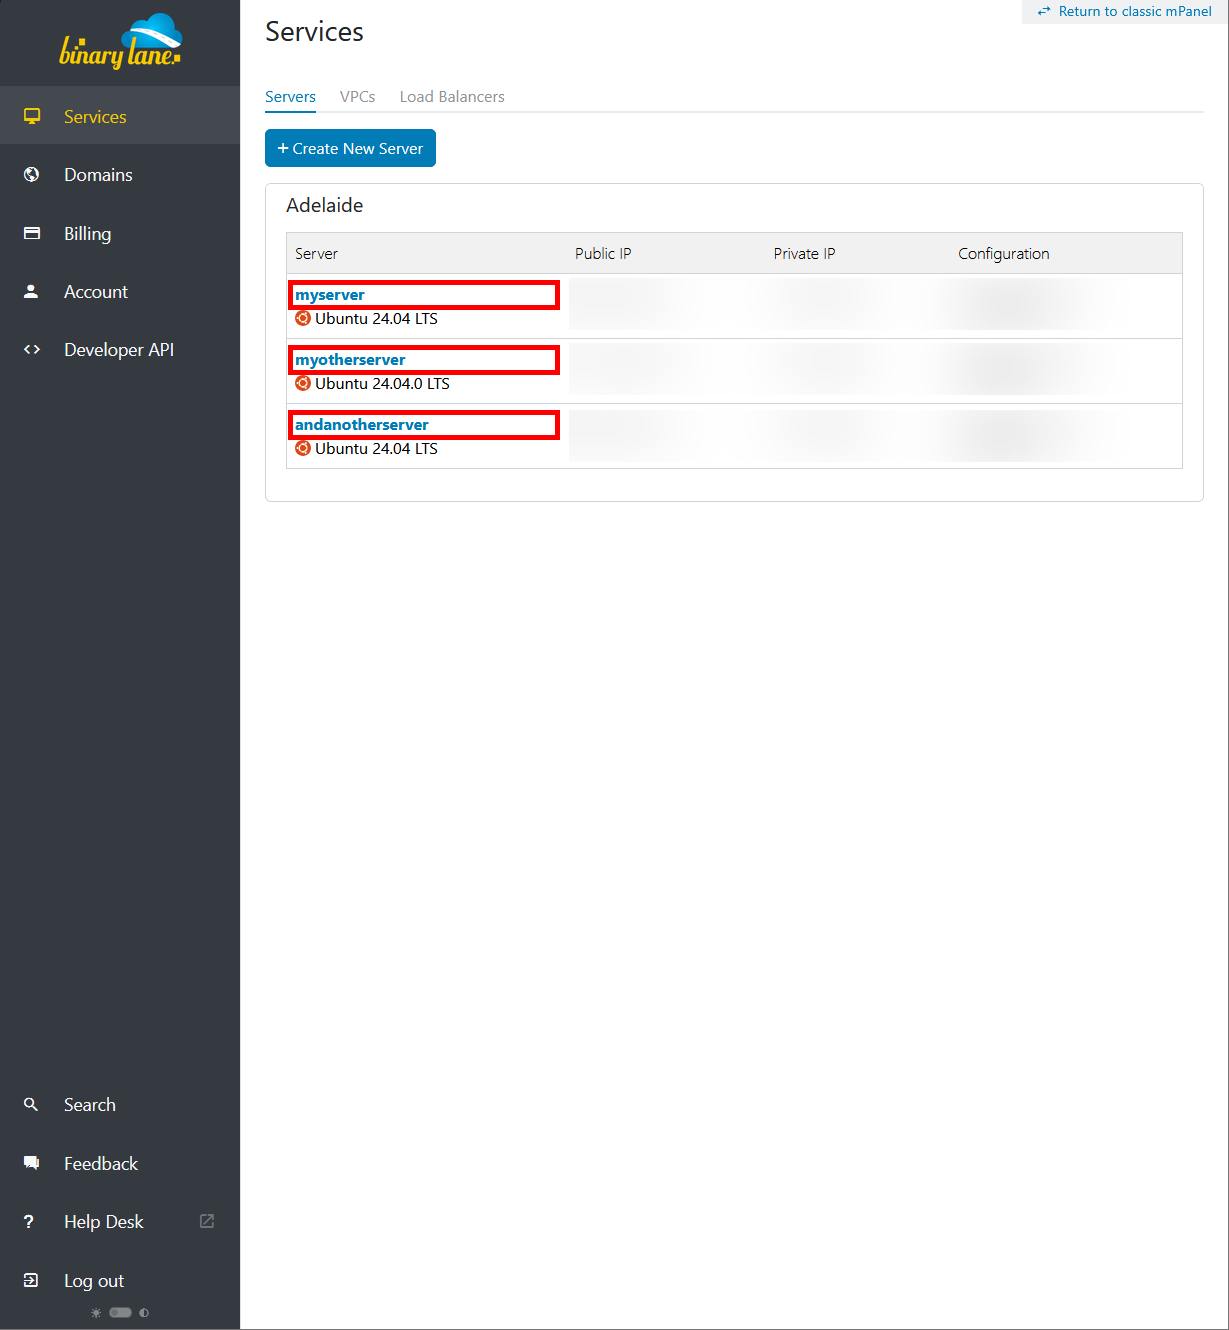
If you have multiple services, you'll also see your hostname in your 'Services' list:

To rename your server:
- Log into your BinaryLane account and navigate to your server within mPanel, followed by selecting the settings icon (⚙️) next to your server's current hostname:

- From the drop-down menu, select the ` - Change Hostname` option:

- From here, define your new hostname:

- Once set, commit the changes by selecting `Update`.
Your Cloud Server's hostname is reflected within the mPanel here: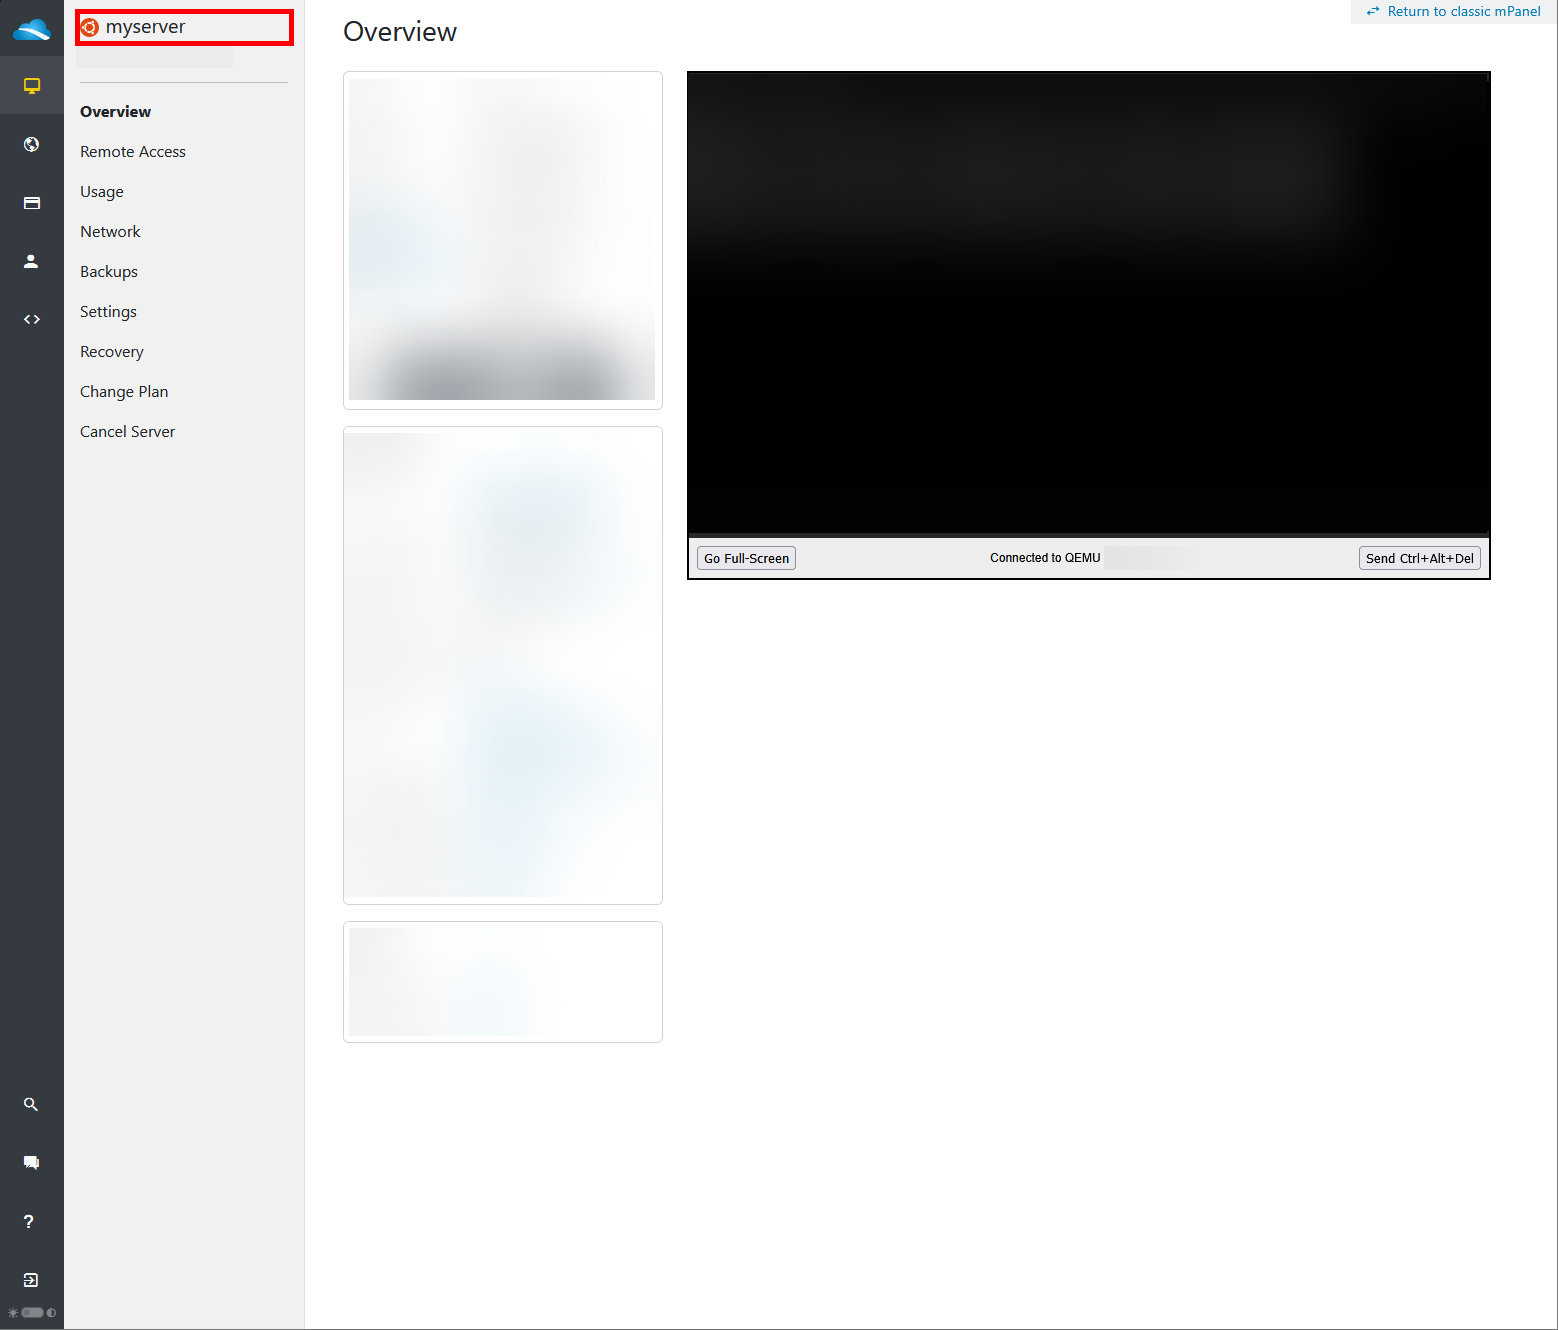
If you have multiple services, you'll also see your hostname in your 'Services' list:
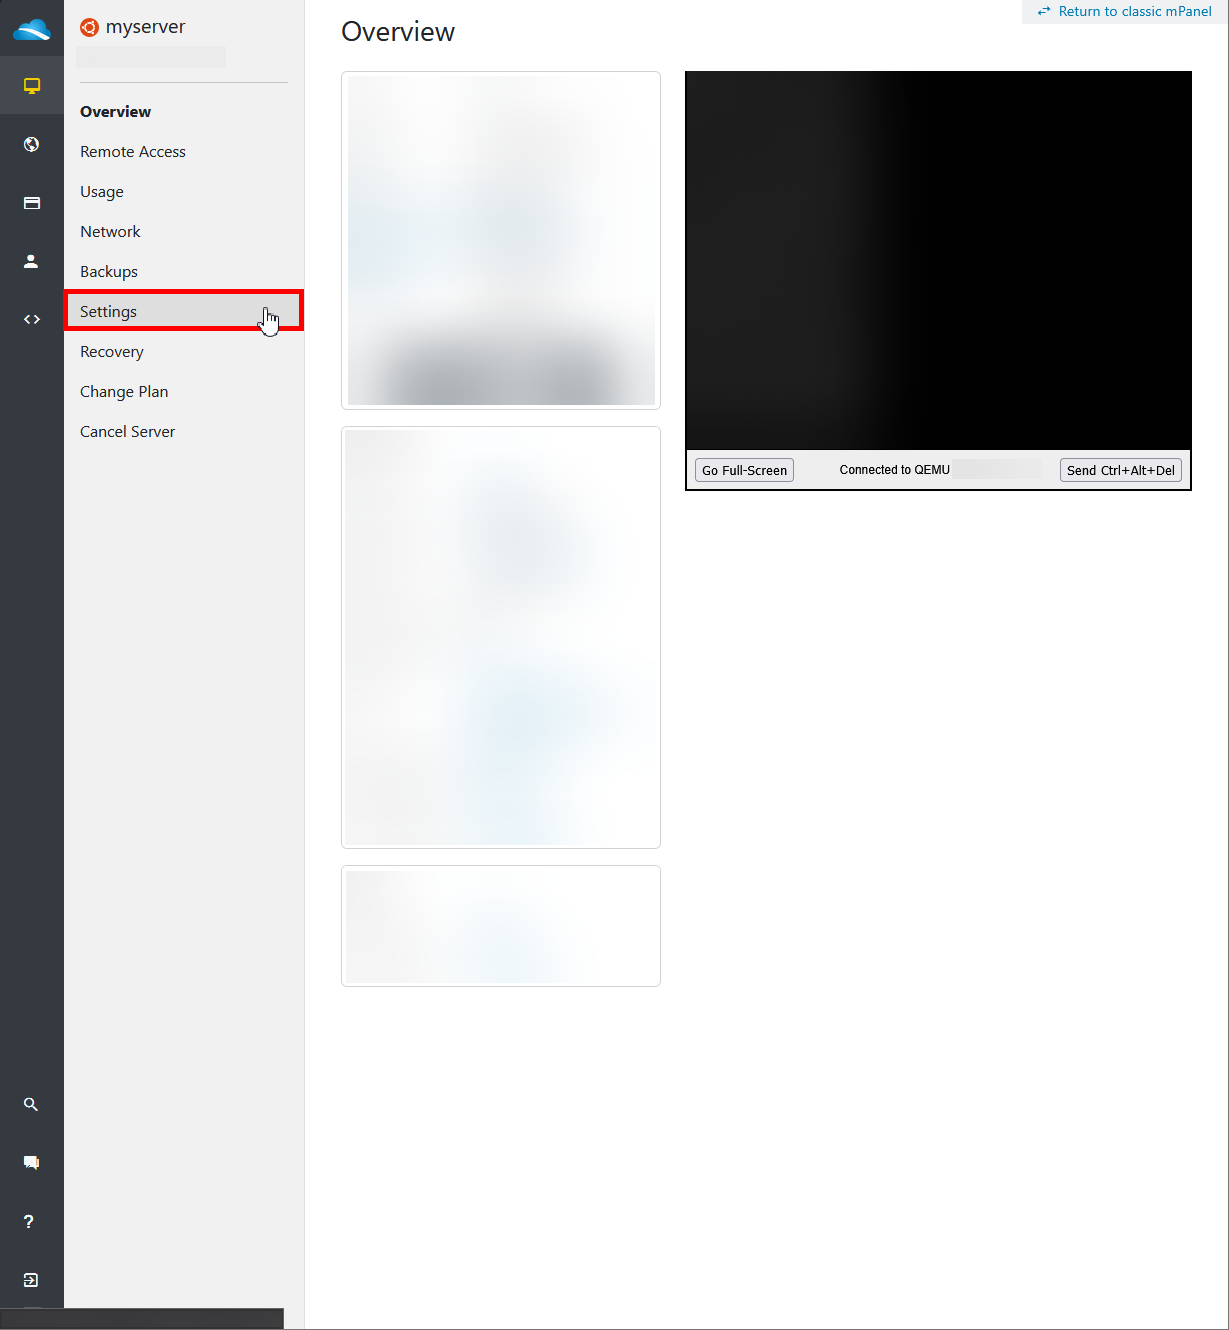
To rename your server:
- Log into your BinaryLane account and navigate to your server within mPanel, then, click the 'Settings' tab from the left-hand navigation pane:
- The first tab in the 'Settings' area will be 'Hostname':
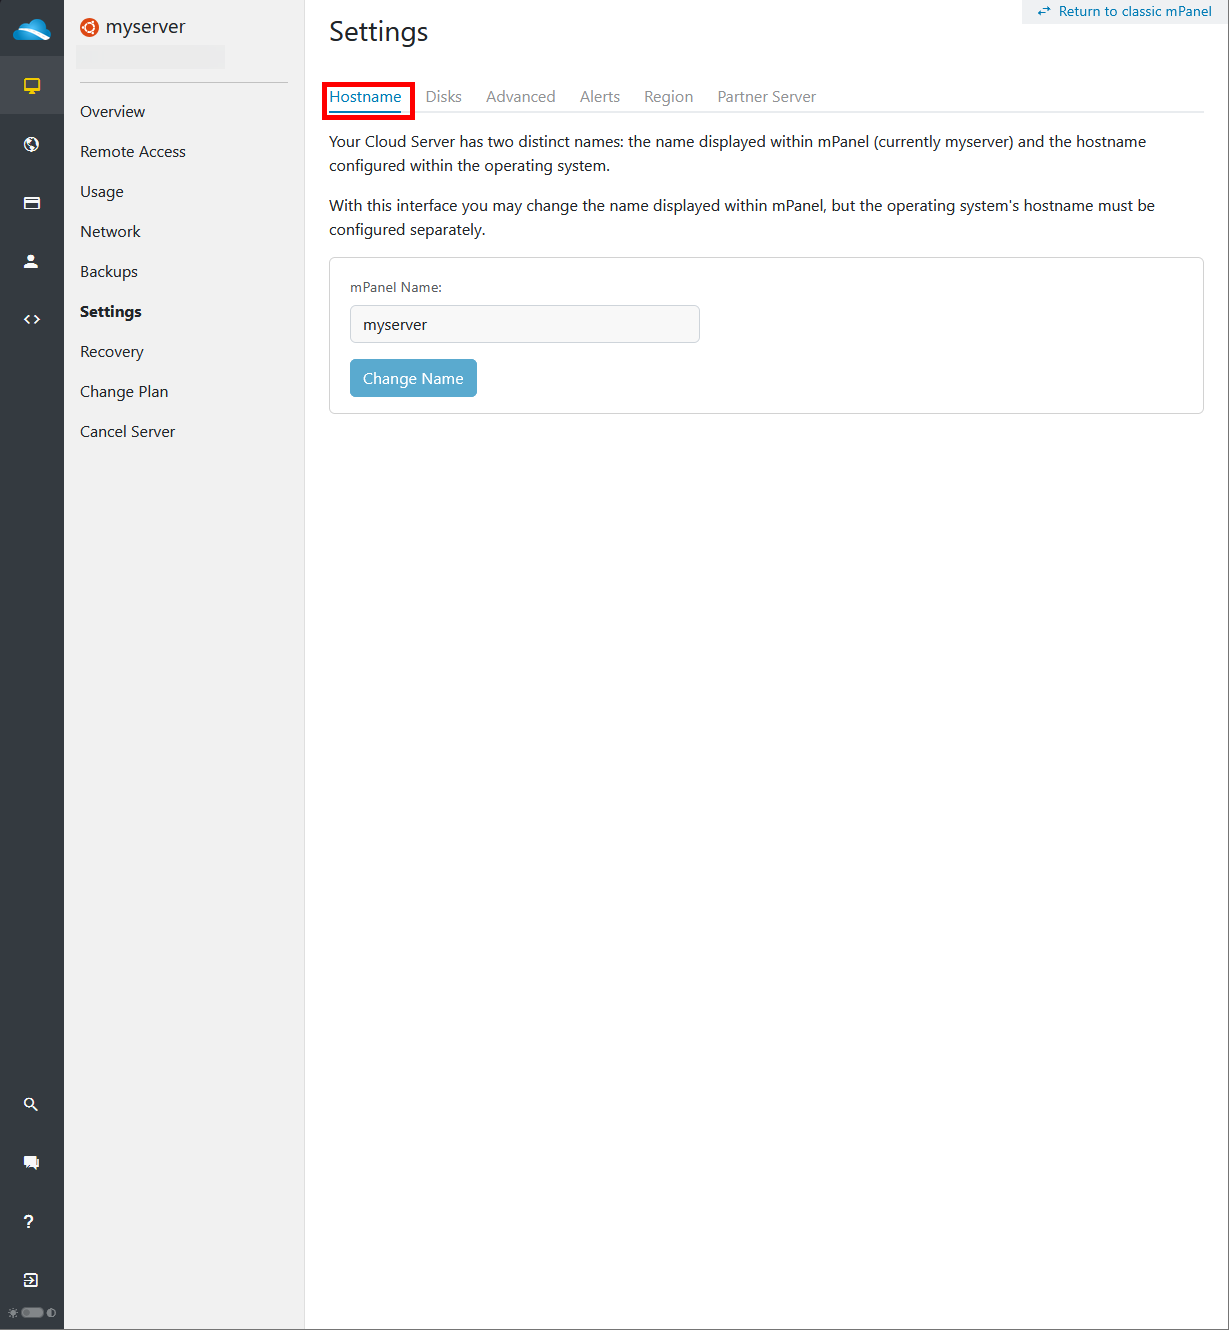
- From here, define your new hostname (mPanel Name):
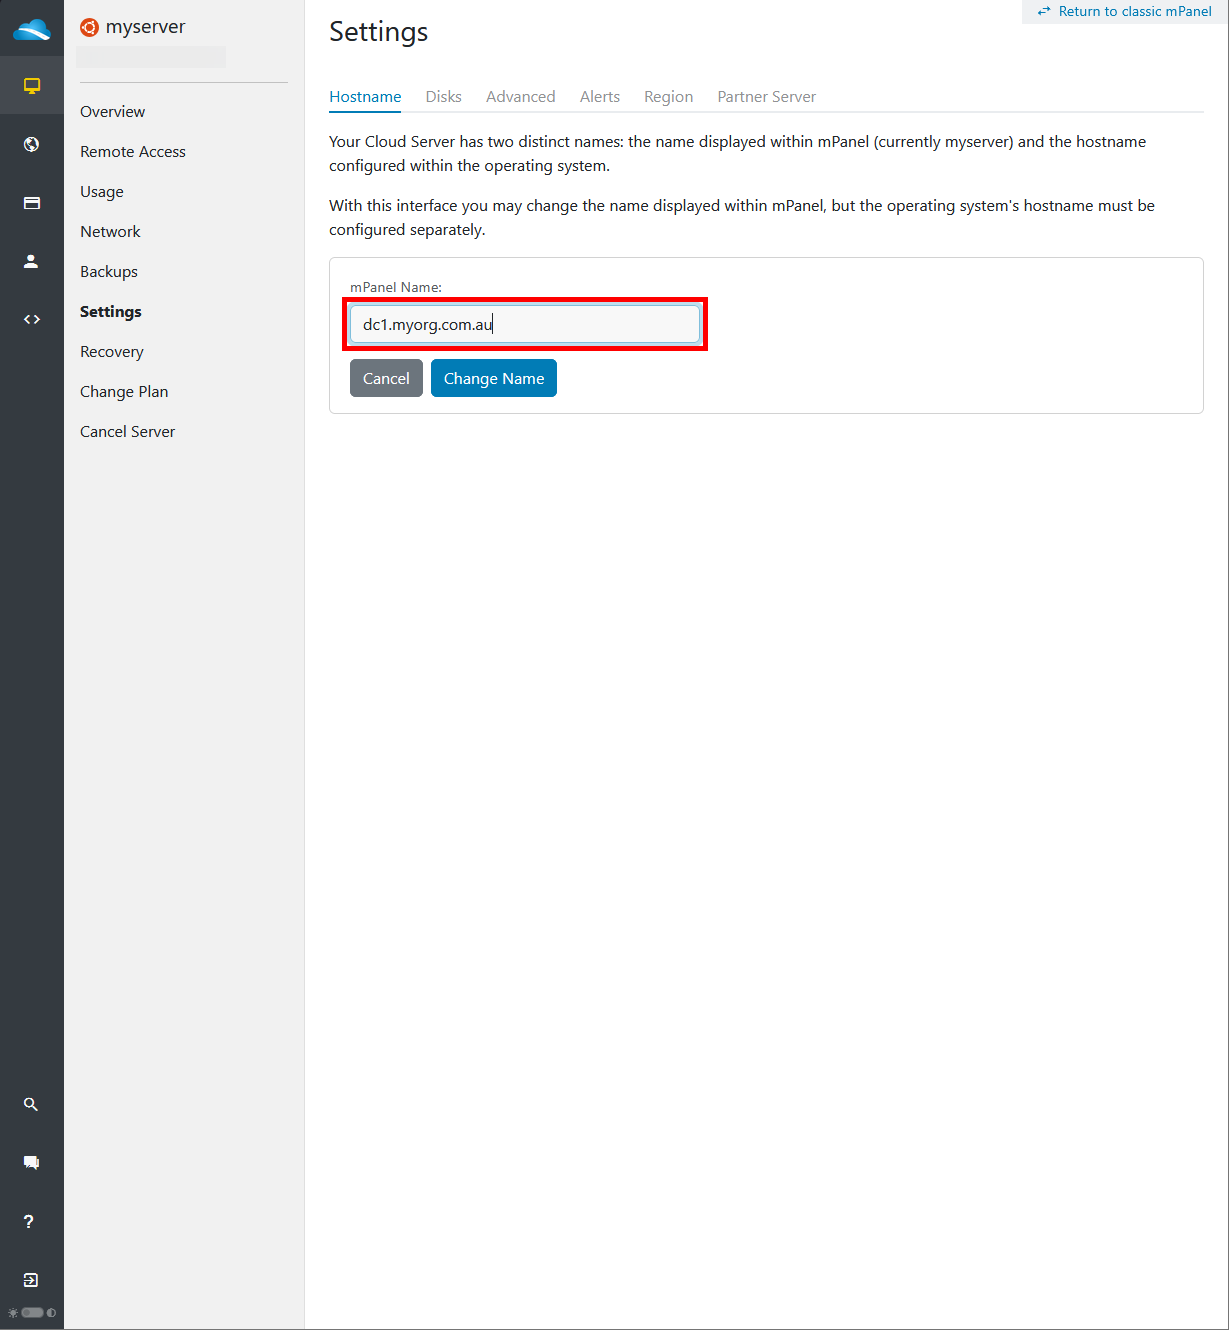
- Once set, commit the change by selecting
 .
.
Rename a Virtual Private Cloud (VPC)
Unfortunately, renaming VPCs isn't a feature currently supported in the legacy version of BinaryLane's mPanel, however, our new beta mPanel (stable) supports this feature. To opt into the new beta mPanel, click this link: https://www.binarylane.com.au/mpanel/switch
The rest of this section will detail how to rename your VPC's 'Network Name' within the new mPanel.
- Log into your BinaryLane account and select 'VPCs' from the navigation bar:

- Select 'Manage' next to the VPC you want to edit

- Select 'Settings' from the side navigation bar:

- From here, define your new Virtual Private Cloud's (VPC's) 'Network Name'

- Once set, commit the changes by selecting `Update`.
Rename a Load Balancer's Hostname
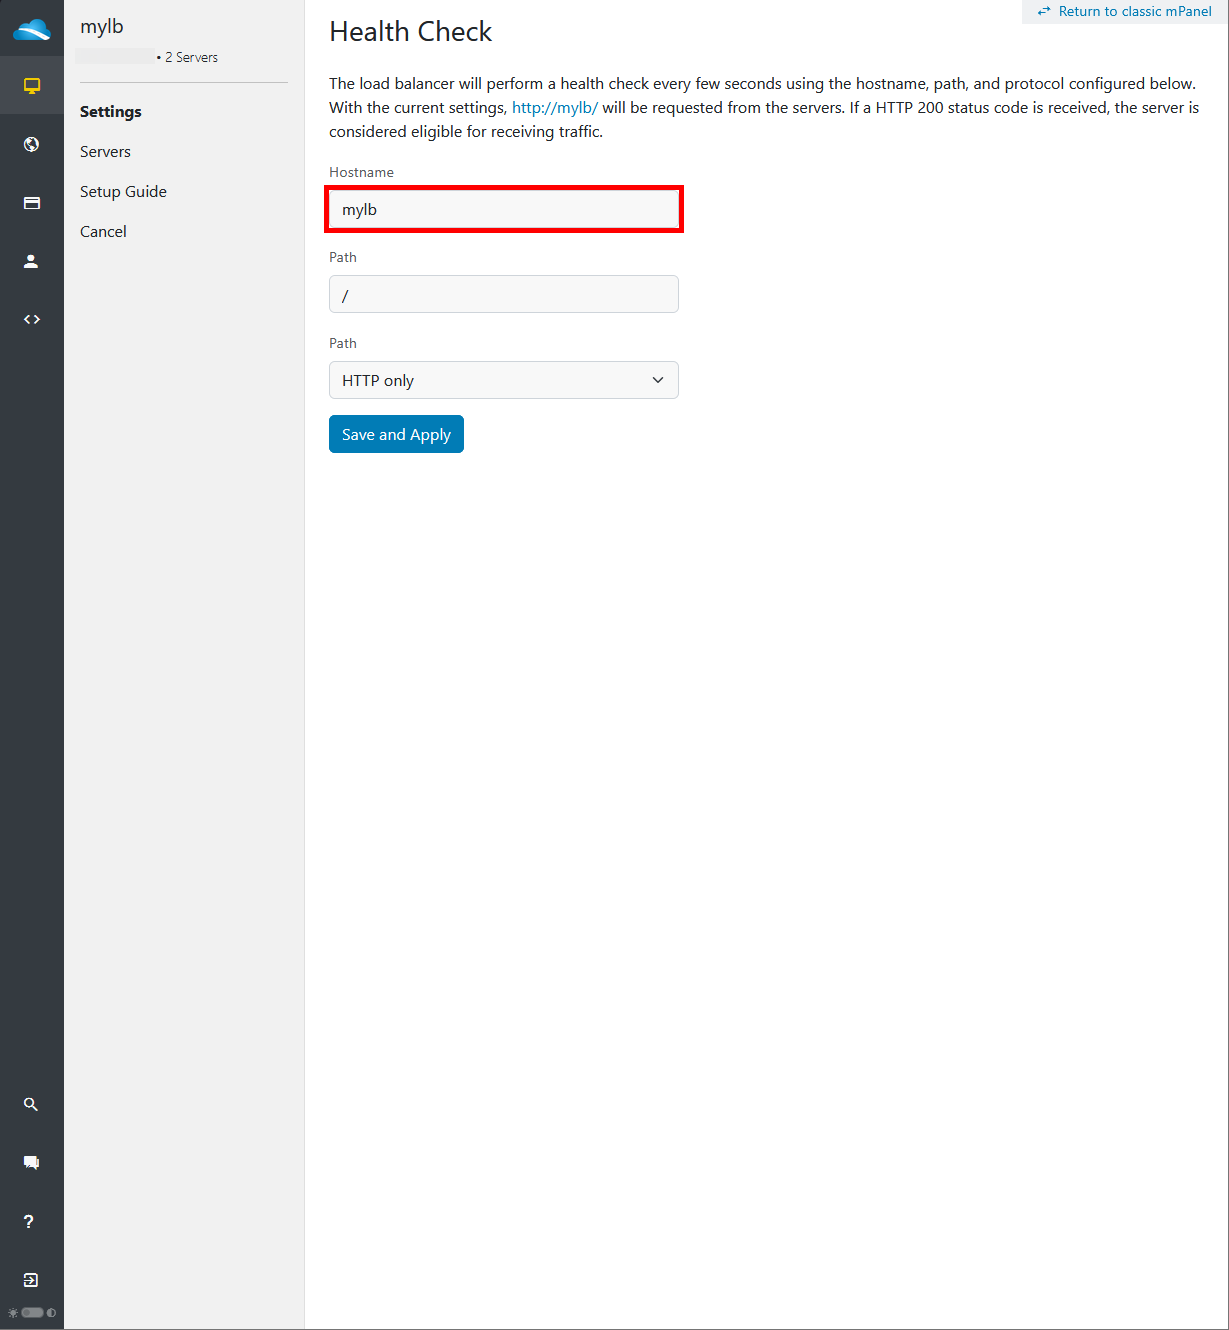
Renaming a Load Balancer's hostname is a fairly straightforward process, however, you'll want to keep in mind that the 'hostname' defined for the load balancer is what the 'Health Check' system uses to verify the availability of your servers. The load balancer will send requests to the new hostname, and if it doesn't receive an HTTP 200 status code, the server will be considered unhealthy and won't receive traffic. Ensure that any hostname change still points to a valid, functioning endpoint to avoid disruptions in traffic distribution. More information about our Load Balancer service can be found here: Load Balancer : BinaryLane
To rename your Load Balancer:
- Log into your BinaryLane account and scroll down to the bottom of your 'Services' page until you find the 'Load Balancing' section, then, select the 'Manage' button next to the Load Balancer you want to edit:

- Define the new Load Balancer's hostname here, and commit the changes by selecting 'Save and Apply':

To rename your Load Balancer:
- Log into your BinaryLane account, then select the 'Load Balancers' tab from within the 'Services' section:
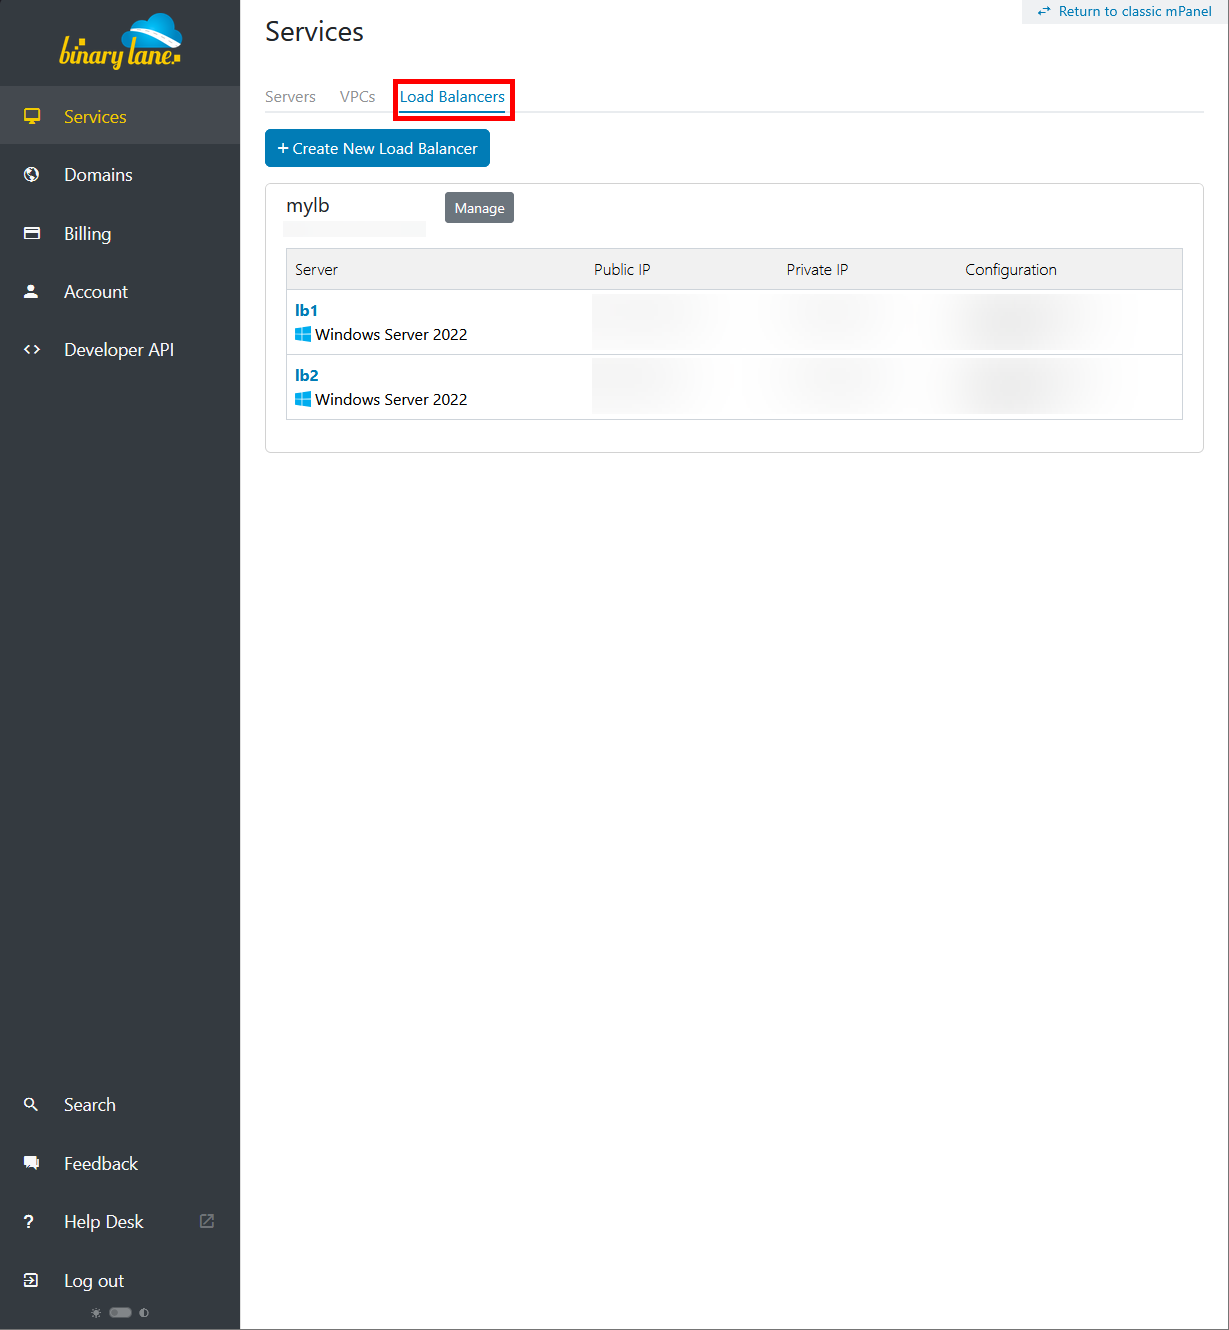
- Click
 in the relevant load balance pane. Define your new load balancer's hostname, then commit the change by clicking
  :
:
Rename an API Key Name
- Log into your BinaryLane account and select 'Account' from the top navigation bar:

- In the 'Security' section, select 'Manage' next to Nova API Key'.

- You'll be redirected to the new mPanel. From here, you can view and edit your existing API keys. Select the 'Rename' button next to the API key you want to edit:

- Rename your token name, then select 'Save' to commit the changes:

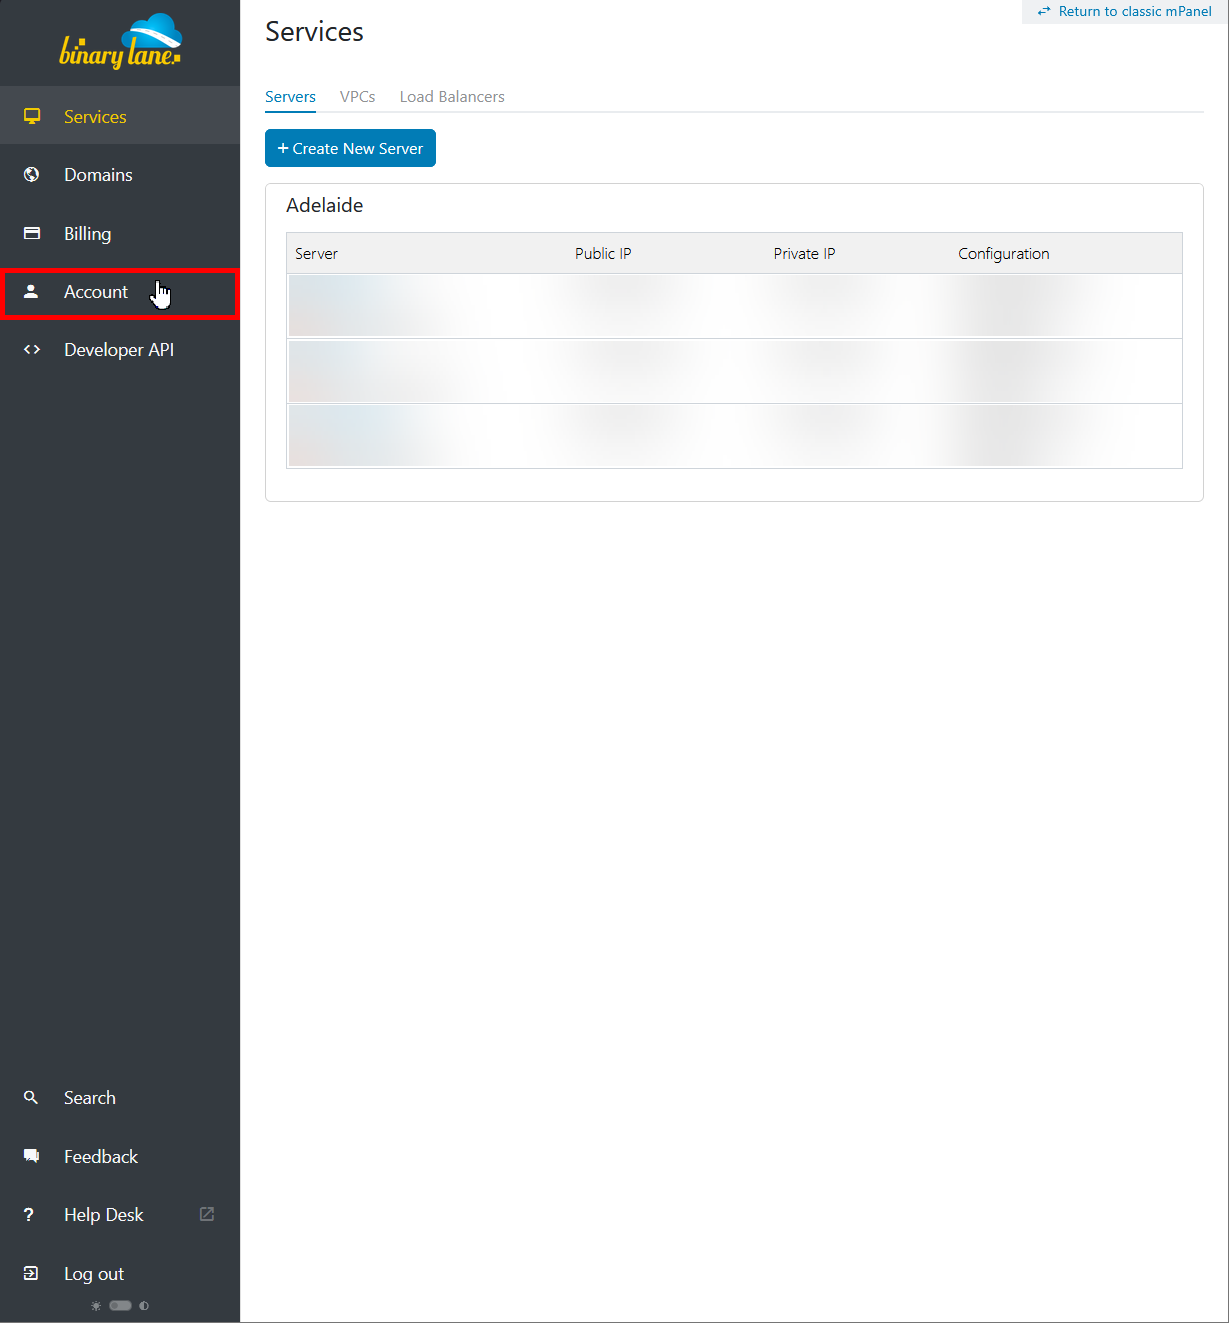
- Log into your BinaryLane account, select 'Account' from the left-hand navigation pane:
- In the 'Security' section, select
 next to 'API Access Token':
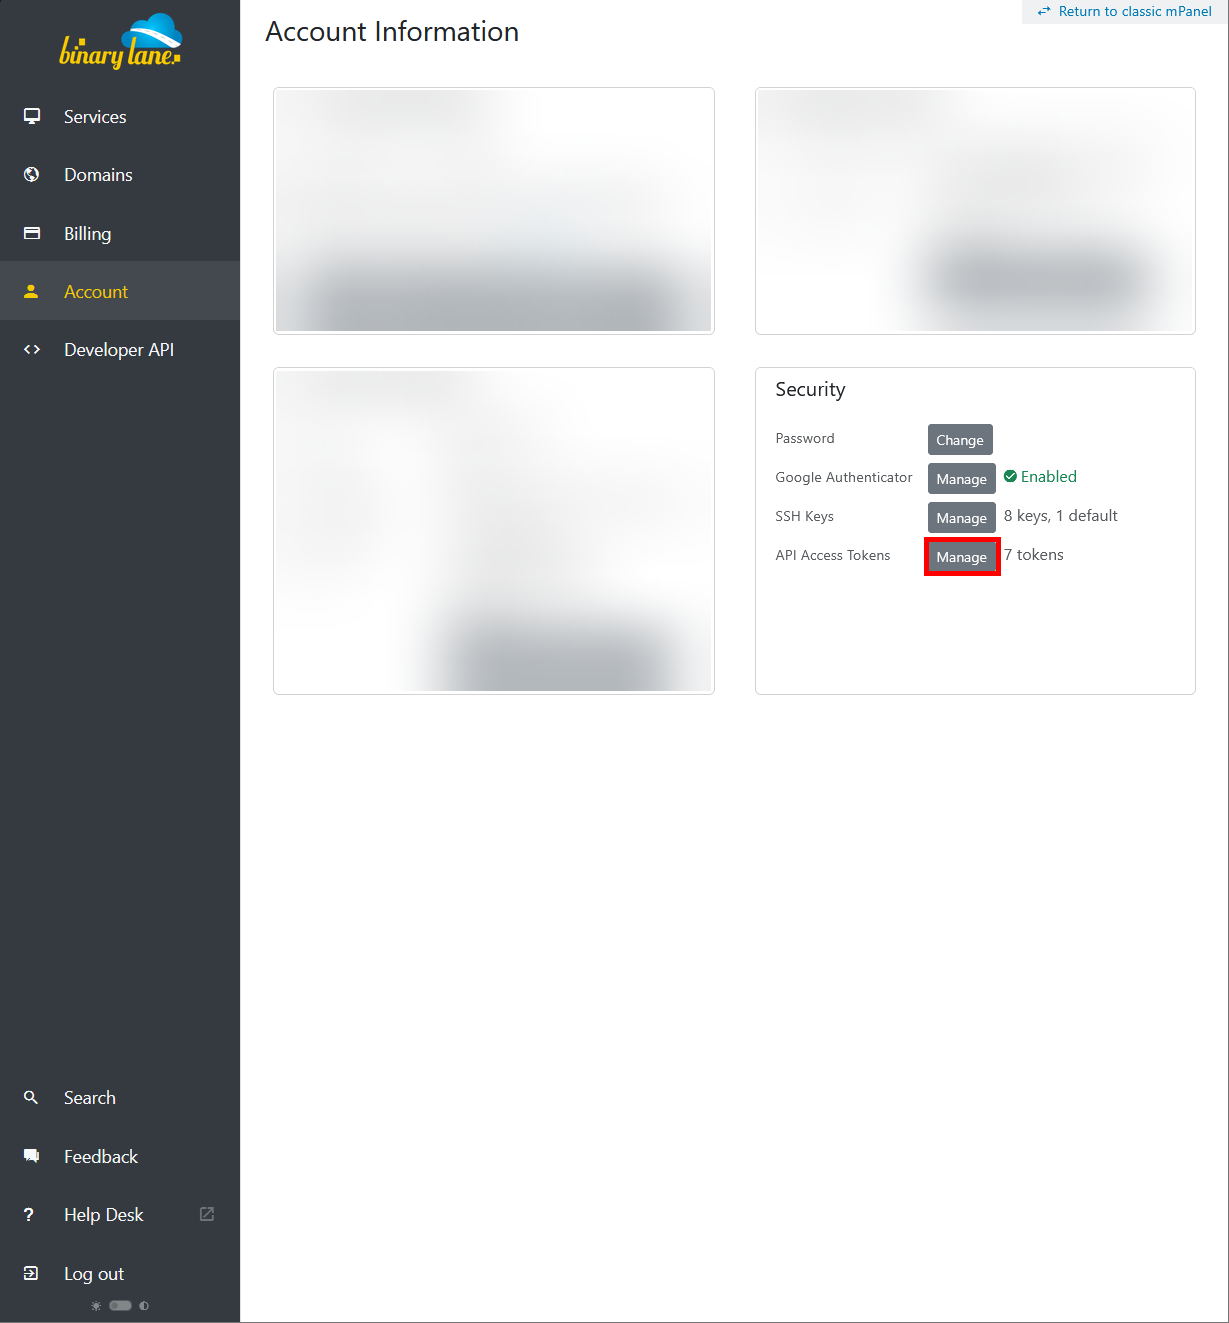
- From here, you can view and edit your existing API keys. Select the 'Rename' button next to the API key you want to edit:
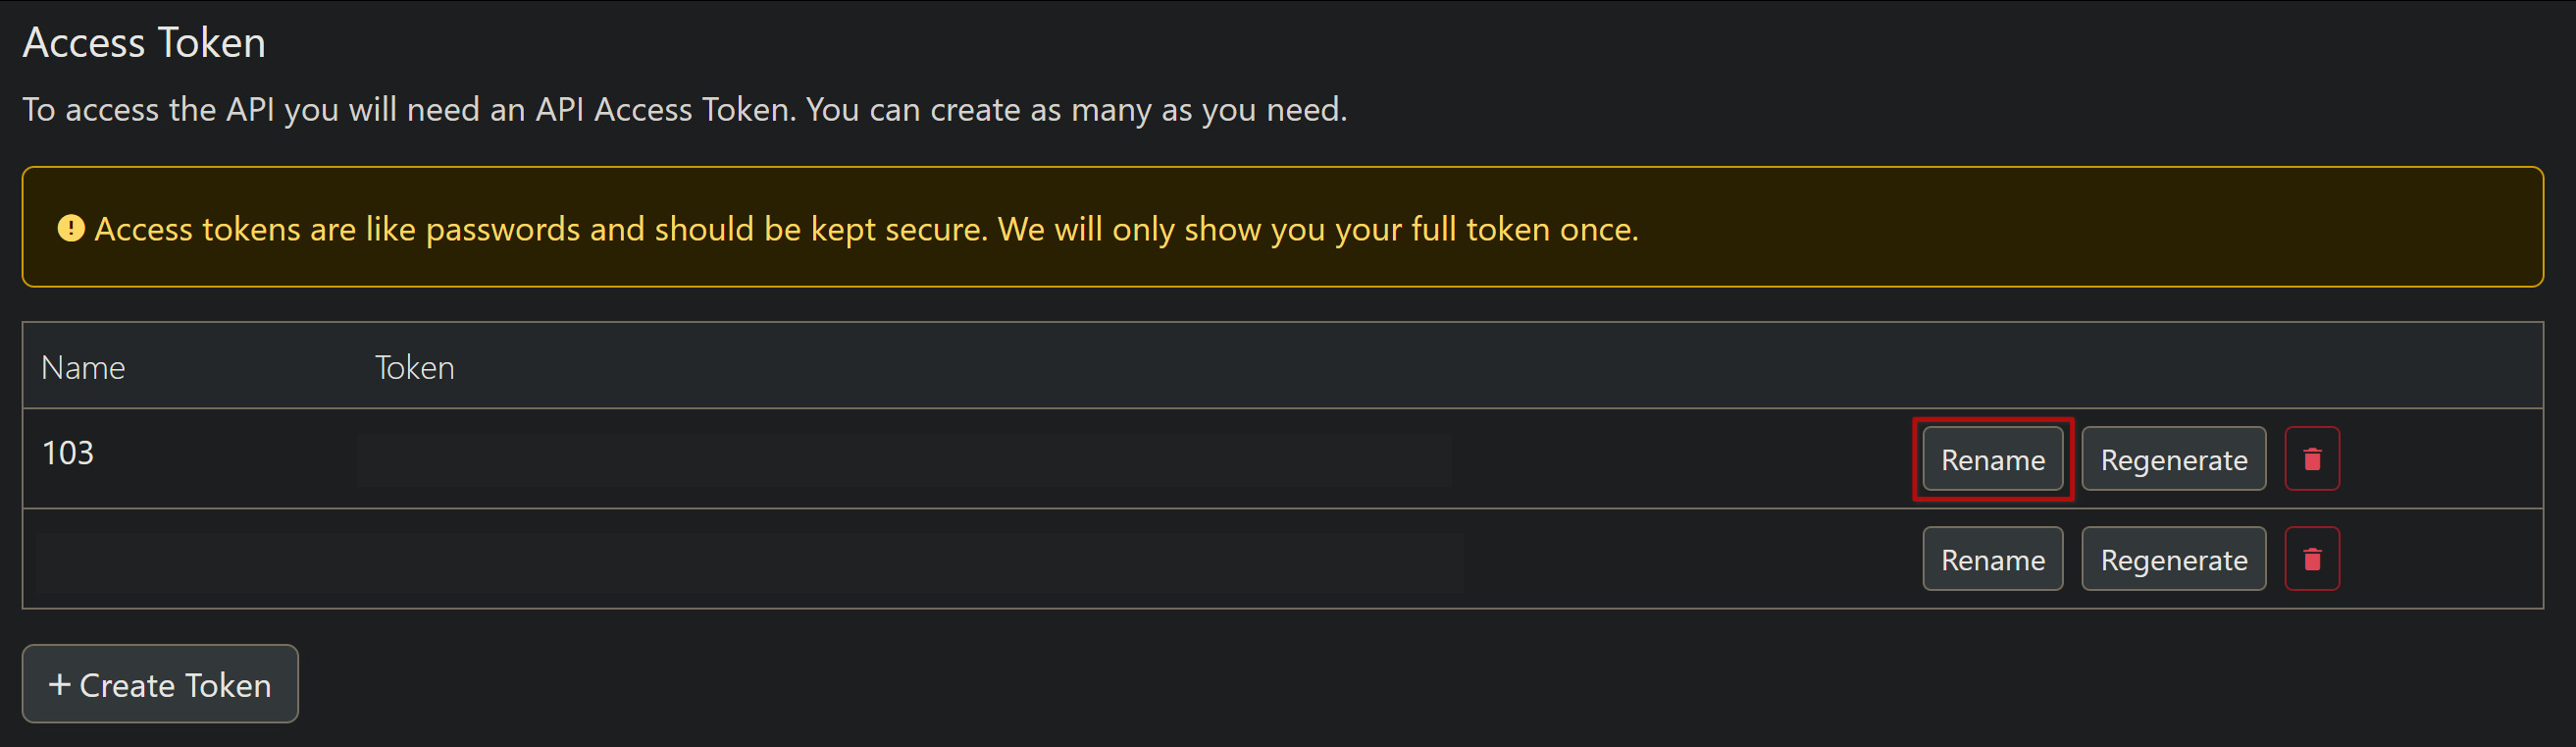
- Rename your token name, then select 'Save' to commit the changes:
If you require assistance, feel free to submit a support ticket at our helpdesk here: Submit a ticket | BinaryLane