
Our Windows servers are provisioned with a "static" IP address. Follow this process to enable DHCP instead:
You can also enable DHCP via a one-liner PowerShell command (ensure you've opened PowerShell as an Administrator):

Set-NetIPInterface -InterfaceAlias "Ethernet" -Dhcp Enabled
- Click the Windows Start button (
 )
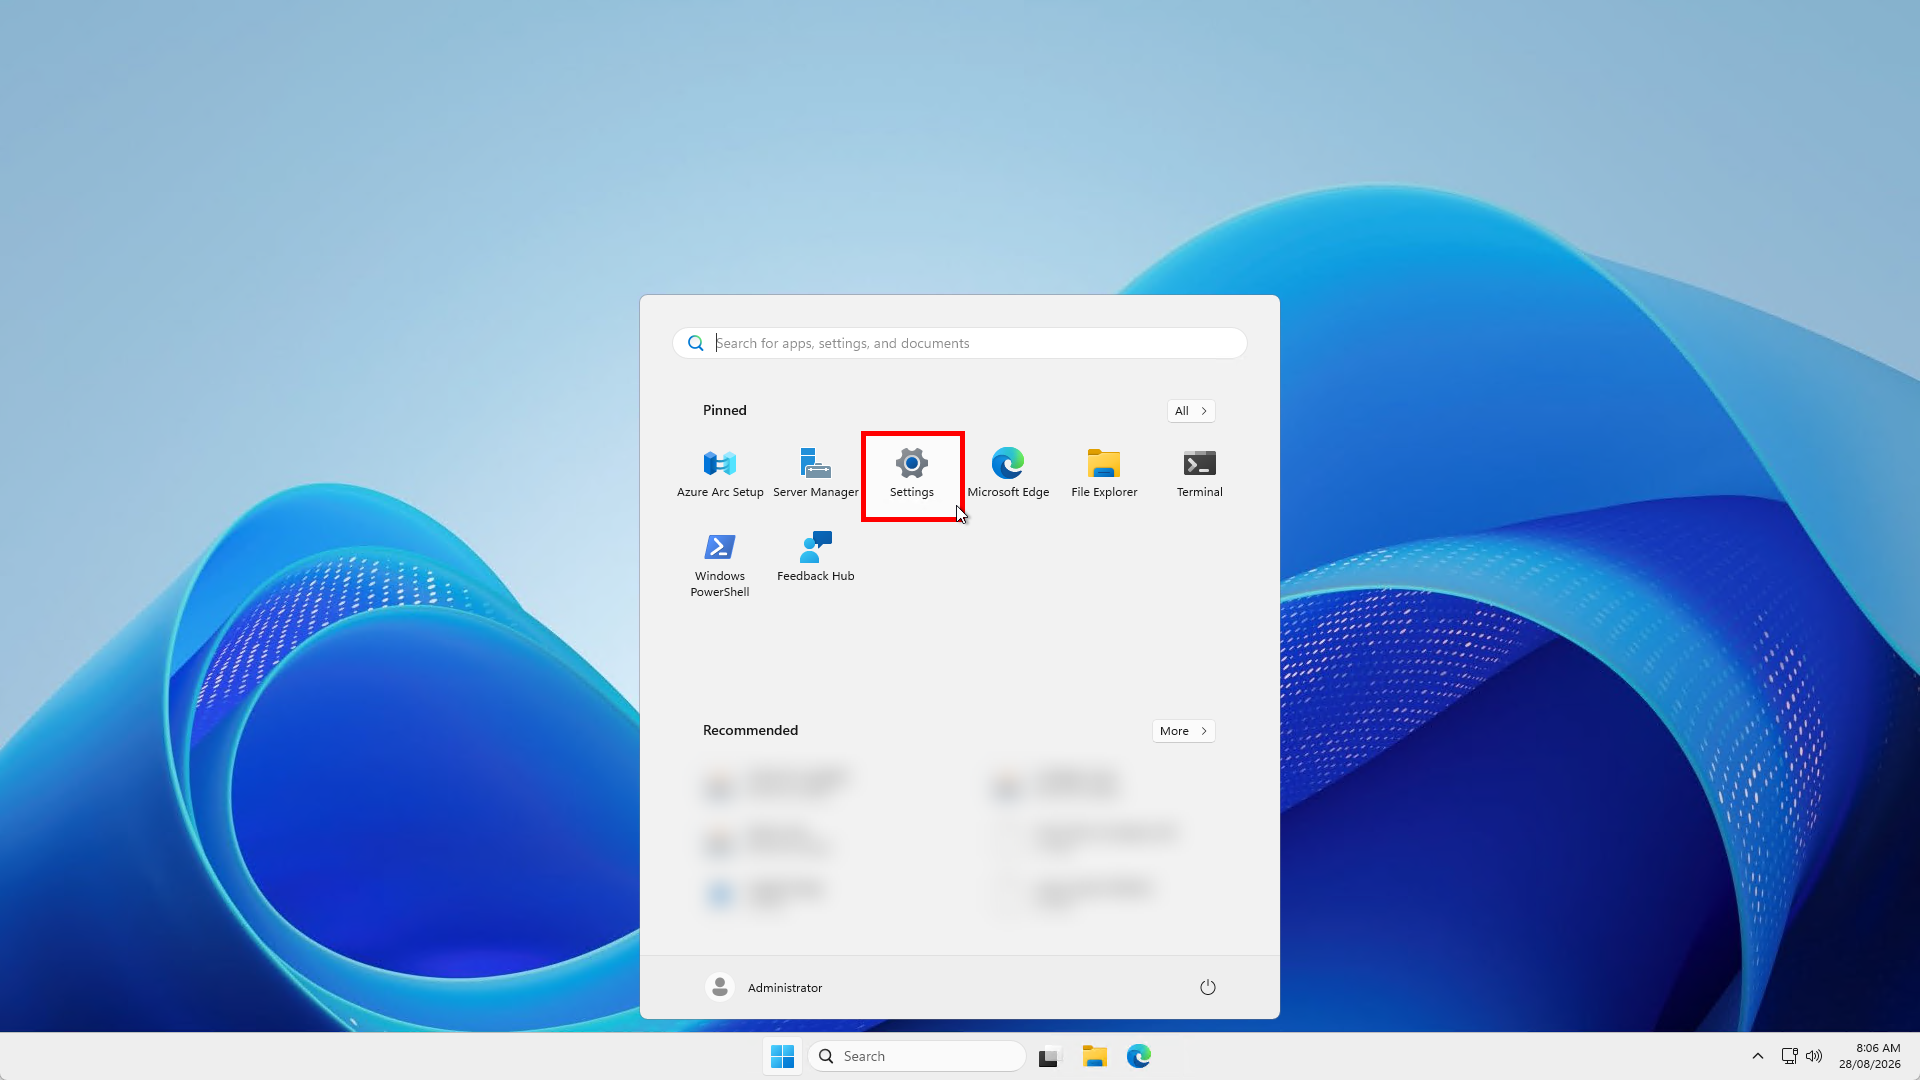
) - Click the settings icon from the quick-start menu:
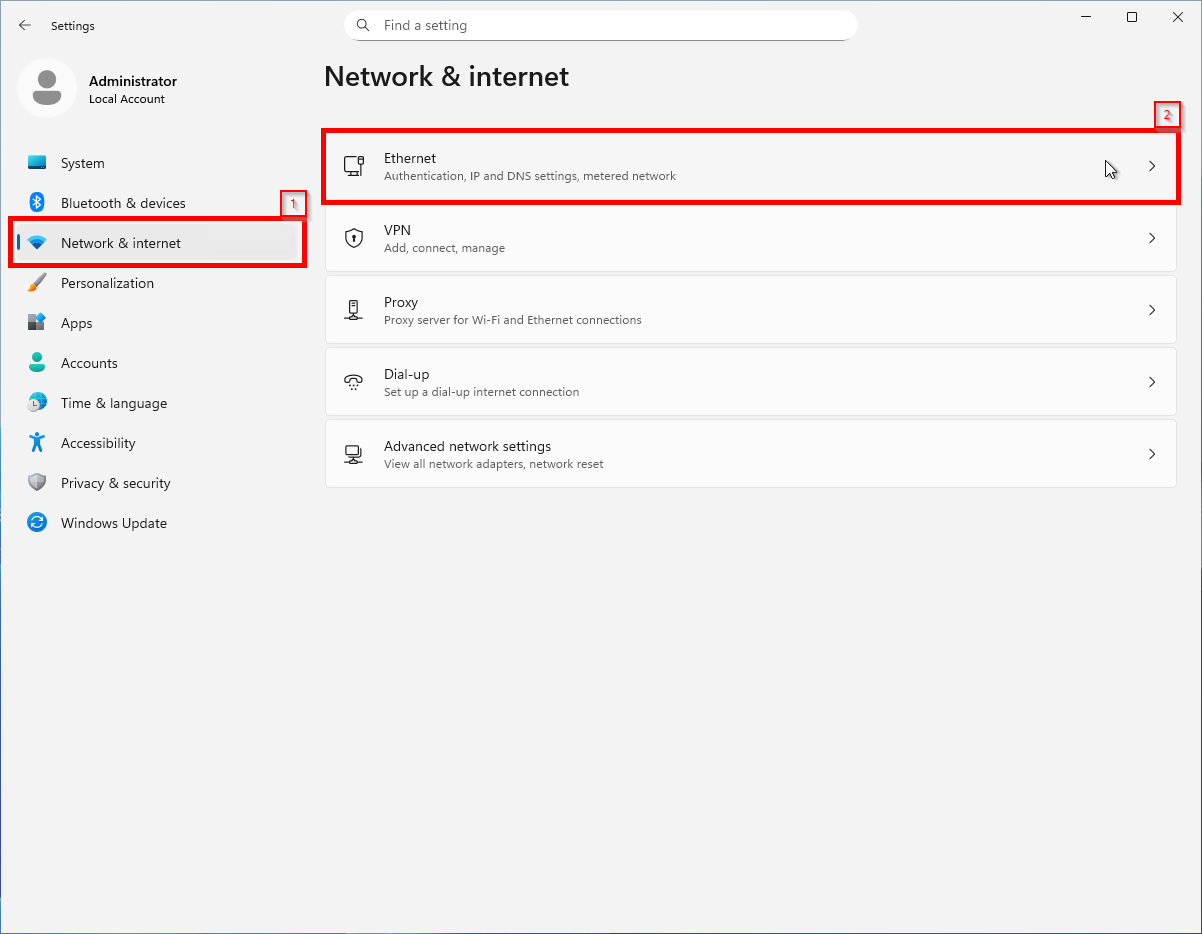
- Click 'Network & Internet', then click 'Ethernet':
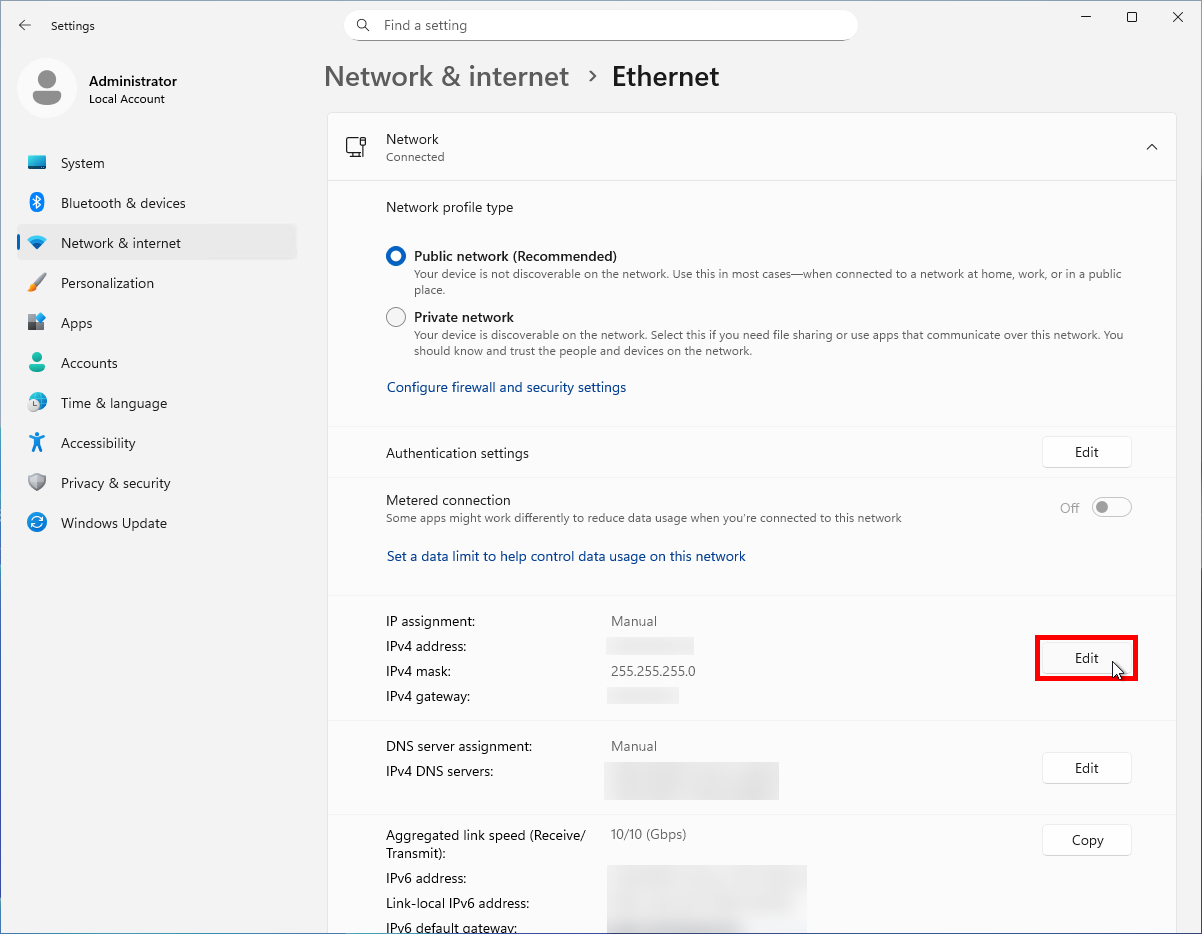
- Click the 'Edit' button next to where your IP address is displayed:
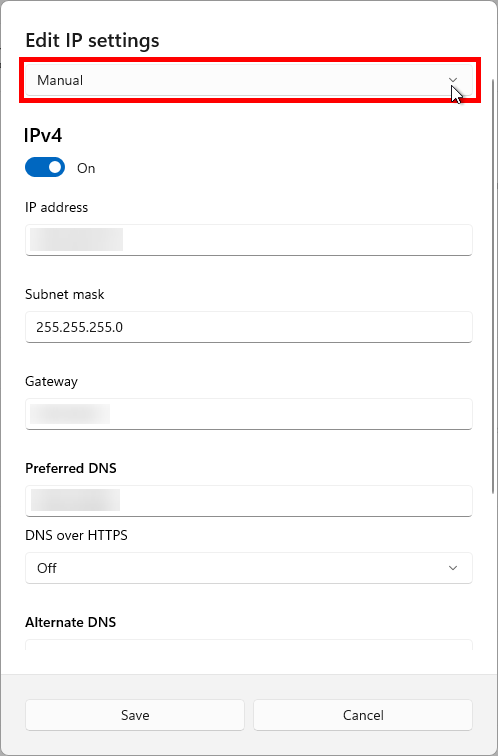
- When you click 'Edit', a pop-up will appear. Click the dropdown box here:
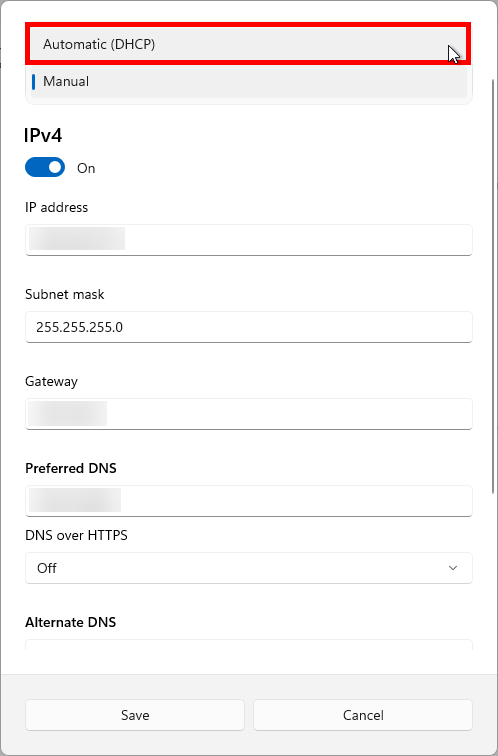
- In the dropdown box, click 'Automatic (DHCP)':
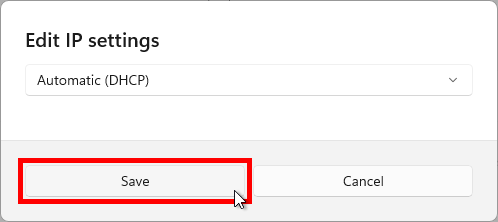
- Click 'Save':
- Note: If you're using Remote Desktop to perform this change, after clicking 'Save', you may experience a brief disconnection. A pop-up will be displayed:
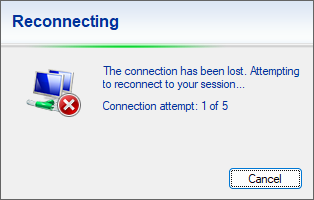
Allow the Remote Desktop session to reconnect automatically. If you're unable to reconnect, you can use the mPanel Rescue Console to investigate what went wrong.
- Note: If you're using Remote Desktop to perform this change, after clicking 'Save', you may experience a brief disconnection. A pop-up will be displayed:
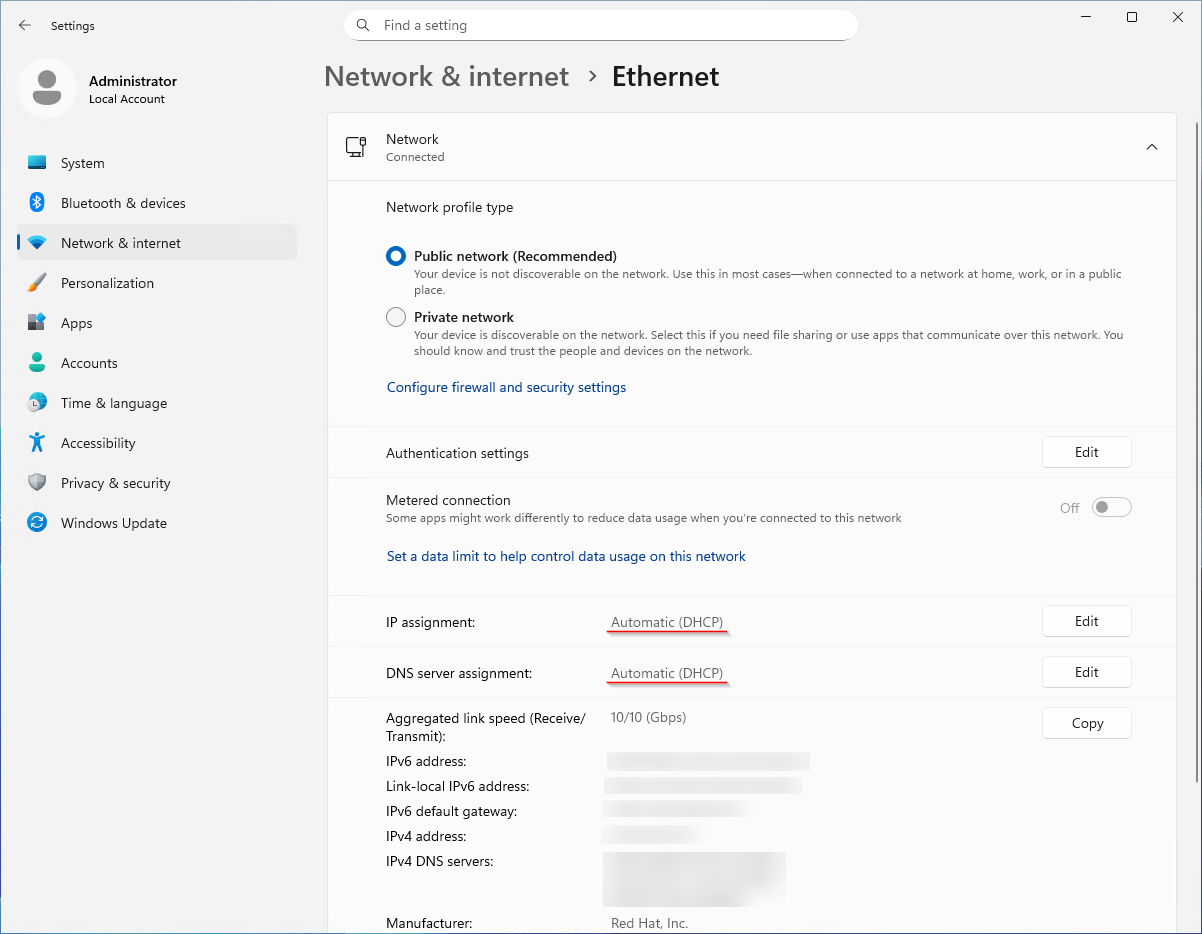
- Your Primary Interface is now configured to use DHCP. You can confirm by checking here:
Our Windows servers are provisioned with a "static" IP address. Follow this process to enable DHCP instead:
1. Click the Windows start button
2. Click Settings icon down the left hand side

3. Click Network & Internet
4. Click Ethernet on the sidebar
5. Click Change adapter options

6. Right-click the Ethernet adapter and then click Properties

7. Click Internet Protocol Version 4 (TCP/IPv4) and then click Properties

8. You will see a screen that is pre-filled with your server's IP address and default gateway - the "static IP configuration". To switch to DHCP, click Obtain an IP address automatically and Obtain DNS server address automatically followed by OK.

9. Close the "Ethernet Properties", "Network Connections", and "Settings" windows that were opened during this process.