
Install FreeBSD 15 on your BinaryLane VPS using the BYO (Bring Your Own) Operating System feature with UEFI enabled. This guide walks through the full process from server creation to the first successful login.
This guide uses the standard FreeBSD installer ISO and a UEFI-enabled BYO VPS. The installation is completed through the Recovery Console in mPanel.
TABLE OF CONTENTS
- Overview
- Step 1: Create Your Server
- Step 2: Select the FreeBSD ISO
- Step 3: Upload the ISO
- Step 4: Attach and Boot
- Step 5: Start the Installer
- Step 6: Install FreeBSD
- Step 7: First Boot
- Troubleshooting
Overview
FreeBSD is a free, open-source Unix-like operating system known for its stability, security, and performance. Using BinaryLane's BYO Operating System feature, you can upload the FreeBSD installer ISO, boot your VPS in UEFI mode, and install FreeBSD directly from the Recovery Console.
What you'll install: FreeBSD 15.0-RELEASE (amd64)
Installer image: FreeBSD-15.0-RELEASE-amd64-disc1.iso
Time required: approximately 15–30 minutes depending on package download speed
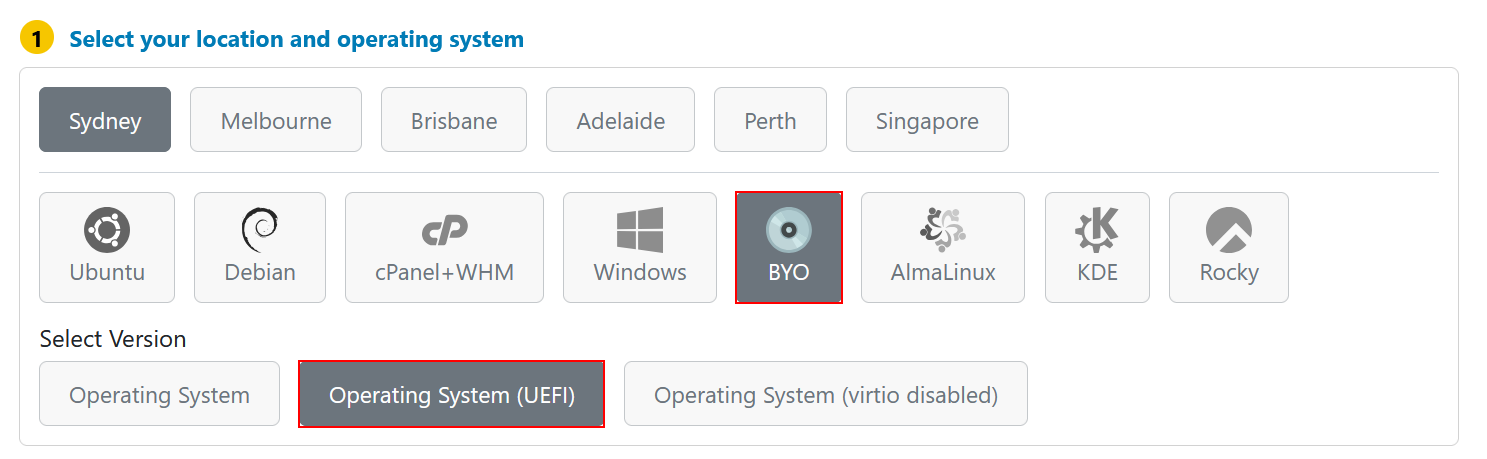
Step 1: Create Your Server
- Go to the BinaryLane VPS signup page.
- In the operating system list, select Operating System (UEFI).
- Choose your preferred plan, region, and hostname, then complete the order.
Step 2: Select the FreeBSD ISO
- Open the FreeBSD 15.0-RELEASE installer directory.
- Use the path Installer > amd64.
- Locate
FreeBSD-15.0-RELEASE-amd64-disc1.iso. - Right-click the file and choose Copy URL.
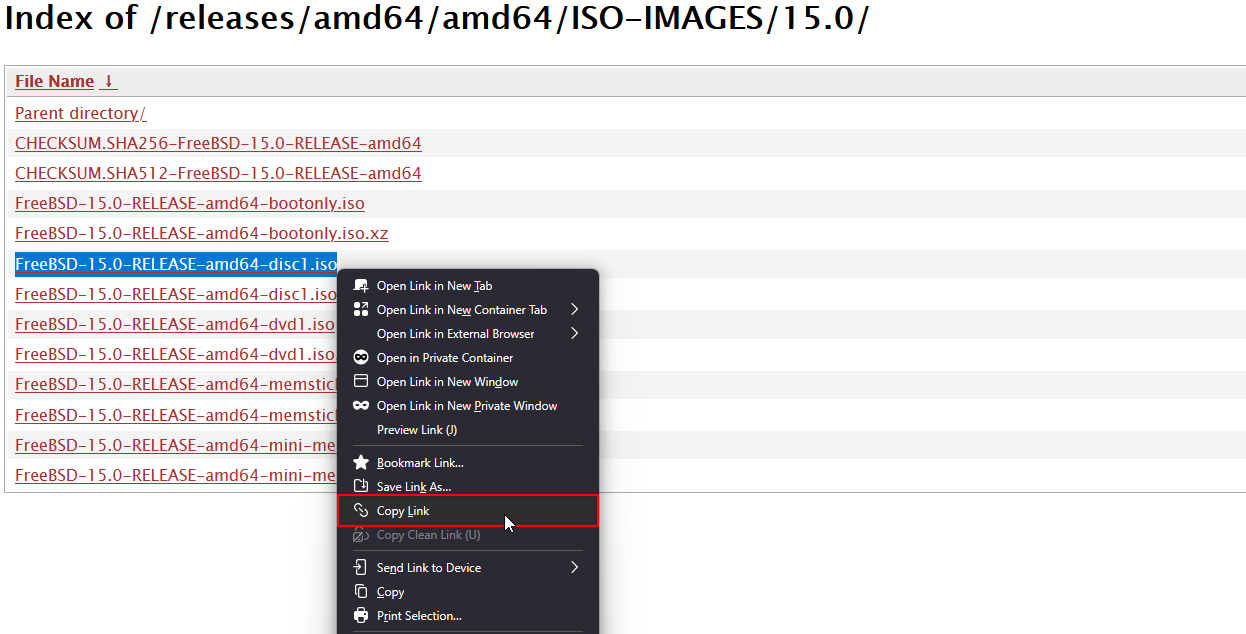
Use the disc1.iso installer image for this process. It is the standard installation ISO and is the safest choice for use through the Recovery Console.
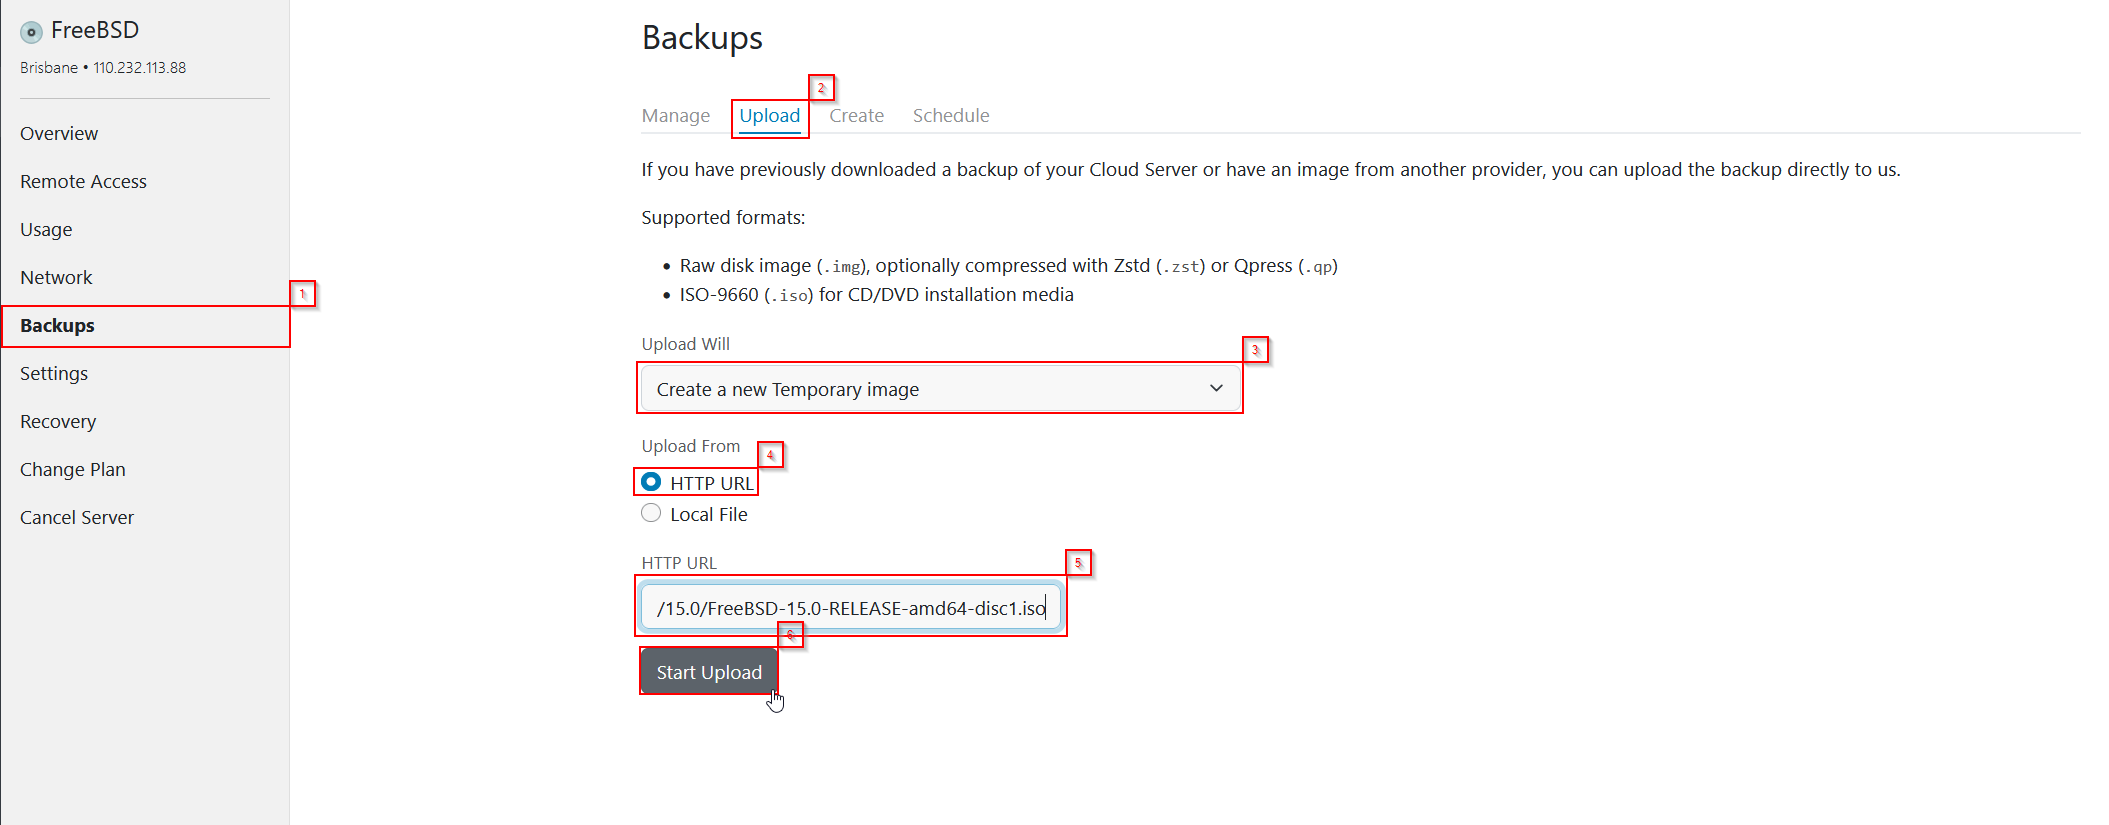
Step 3: Upload the ISO
- After your VPS is created, you should arrive on the Backups > Upload page automatically. If not, open Backups from the left menu, then click the Upload tab.
- Set Upload Will to Create a new Temporary image.
- Set Upload From to HTTP URL.
- Paste the FreeBSD ISO URL you copied earlier into the HTTP URL field.
- Click Start Upload.
Step 4: Attach and Boot
- Wait for the upload to complete.
- Close the Upload Image popup.
- Click Attach & Boot for the uploaded FreeBSD ISO.

You will be redirected back to your server page while the system attempts to boot the ISO.
If the ISO does not boot the first time, wait a minute and perform a Power cycle from mPanel. If the server still does not come online after another minute, please contact BinaryLane support.
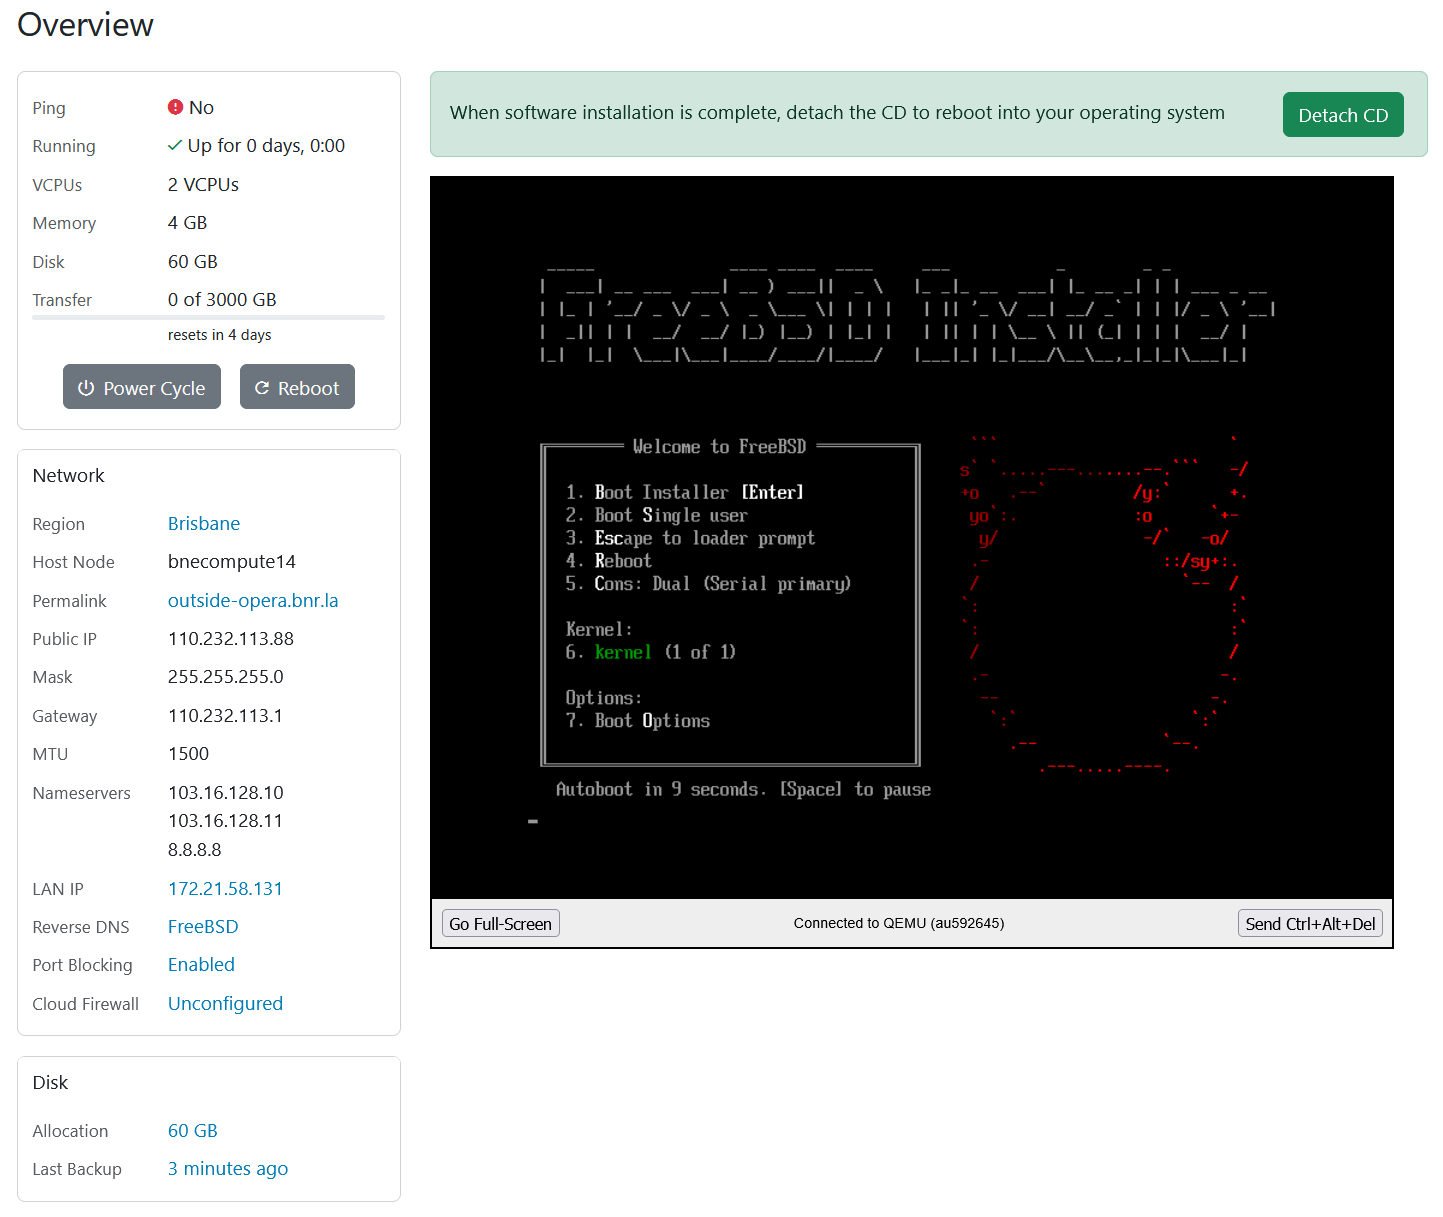
Step 5: Start the Installer
- Open the Recovery Console.
- Allow FreeBSD to boot automatically from the ISO.
- When the installer menu appears, click inside the Recovery Console to activate the keyboard, then press Enter to start the installation.
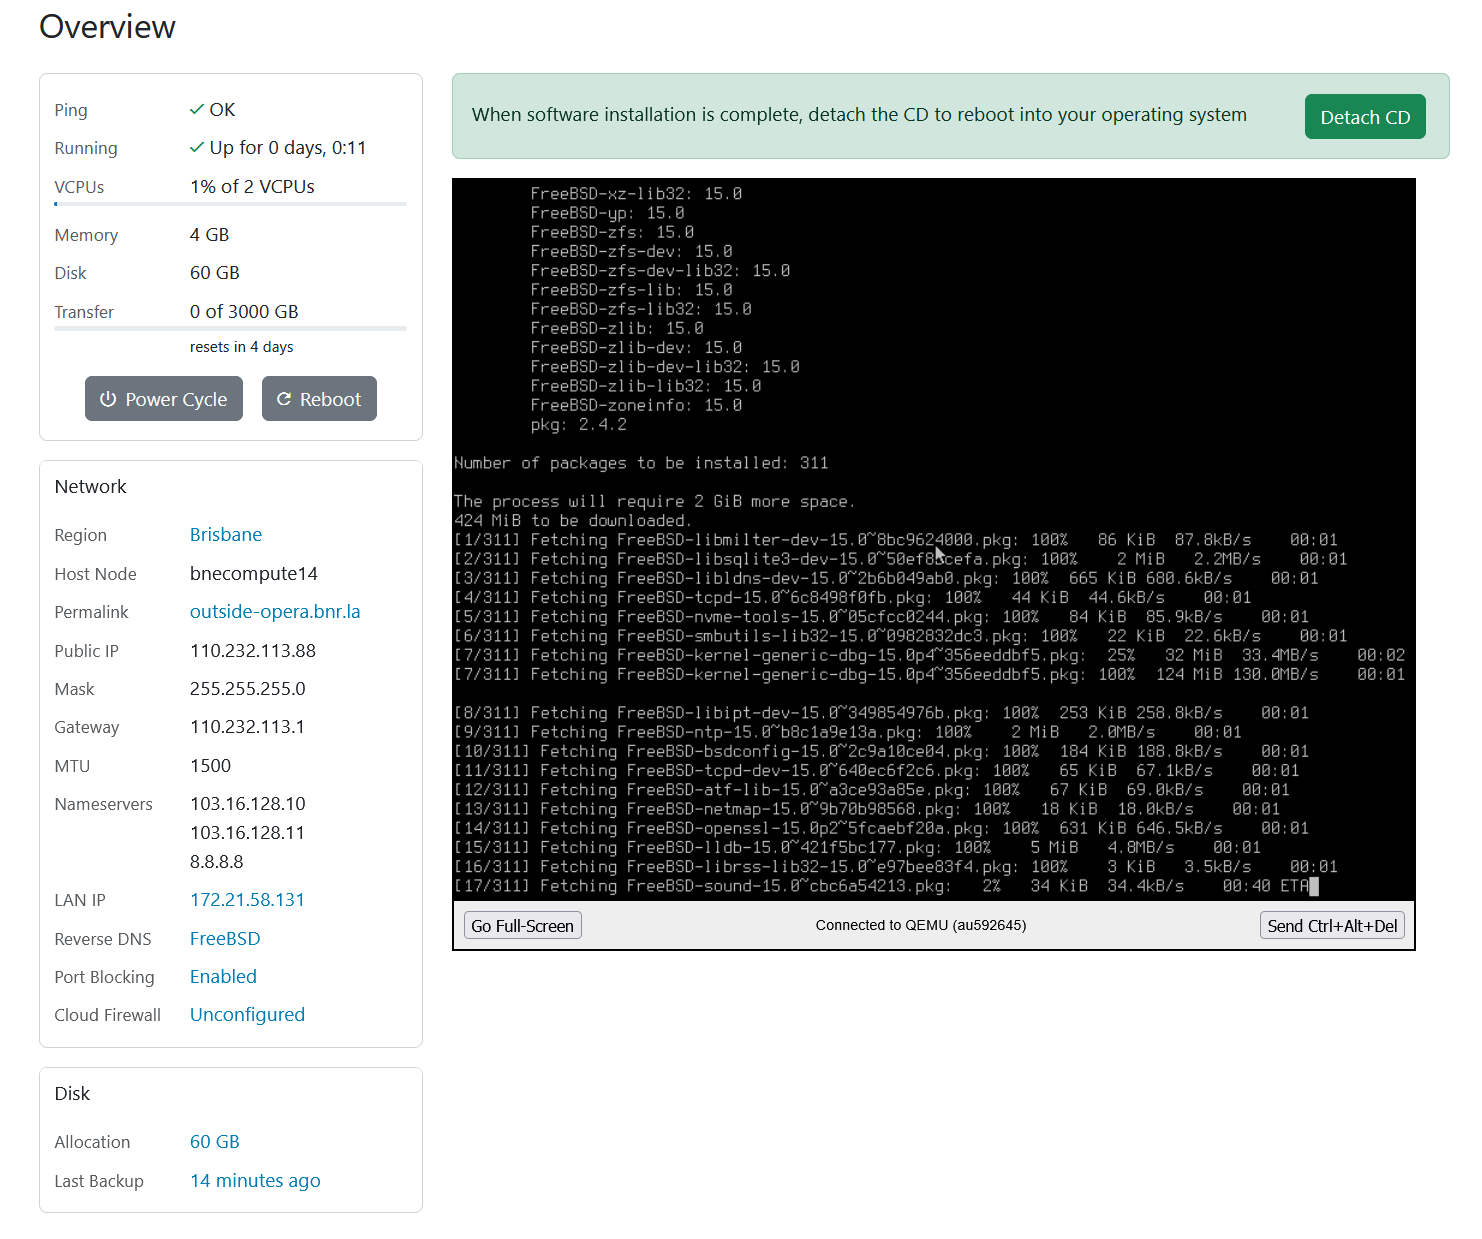
Step 6: Install FreeBSD
Complete the FreeBSD installer using the following selections:
- Keymap: press Enter on Continue with default keymap
- Hostname: choose the hostname you want to use for the machine
- Installation source: choose Packages (Tech Preview)
- Package source: choose Network
- Network configuration: press Enter on Auto so DHCP configures networking automatically
- Partitioning: choose Auto ZFS, then continue with the default install flow
- Virtual device type: leave as stripe (no redundancy)
- Disk selection: press Space to select the disk, then press Enter
- Confirm overwrite: press Y
- System components: leave the default selections unless you need extra components
- Root password: set a root password when prompted
- Timezone: select Australia, then your region/state as required
- Boot services: enable any services you want available at boot. Enabling moused can make Recovery Console navigation easier
- System hardening: consider enabling clear_tmp and secure_console
- Firewall: skip this step if you do not need it during installation
- Add user accounts: choose No if you intend to log in as root first
- Final configuration: select Finish
- Open a shell for final modifications: choose No
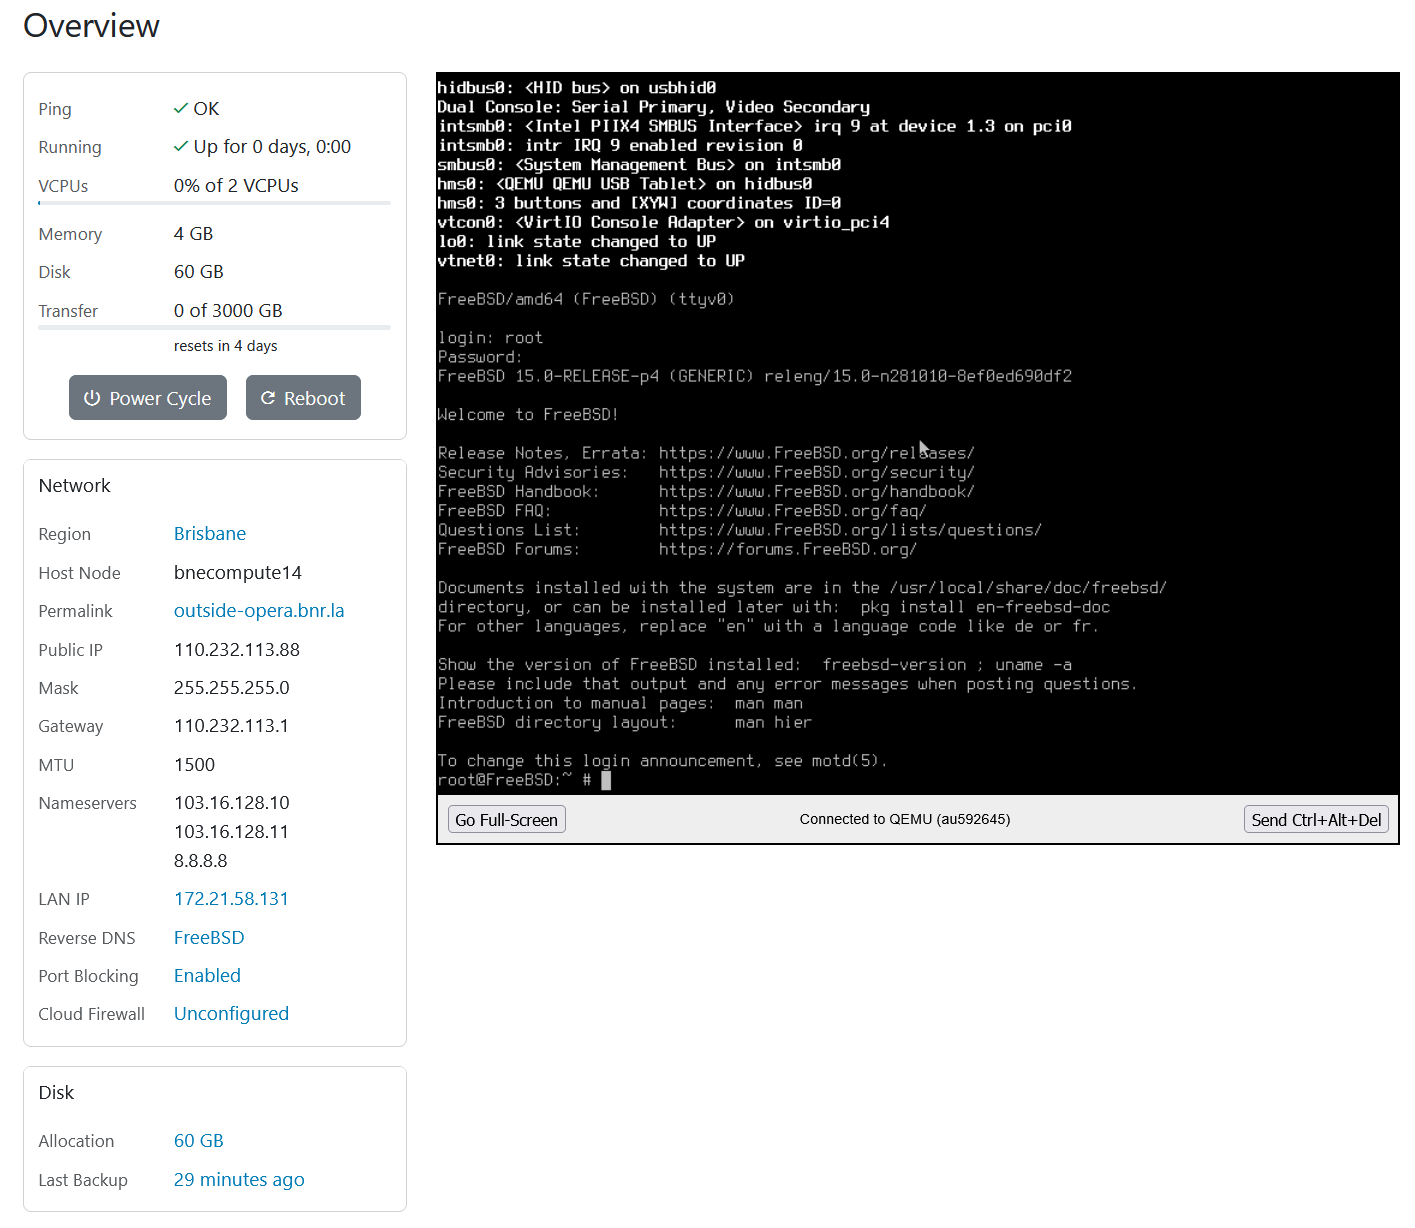
Step 7: First Boot
- When the installer finishes, press Enter to reboot.
- As the reboot starts, click Detach CD.
- Then perform a Power-cycle so the server boots from the installed FreeBSD system immediately.
- After the final reboot, log in as root using the password you set during installation.
- You can then connect over SSH using your preferred SSH client, such as PuTTY.
Troubleshooting
- ISO did not boot: wait a minute and power-cycle the server, then try again.
- Installer has no keyboard input: click inside the Recovery Console window before using the keyboard.
- Installer cannot fetch packages: verify that you selected Network and that automatic DHCP completed successfully.
- Server does not come online after install: confirm the CD/ISO was detached, then power-cycle the VPS again.
If the server still does not boot the installer or installed system correctly after a power-cycle, please contact BinaryLane support for assistance.